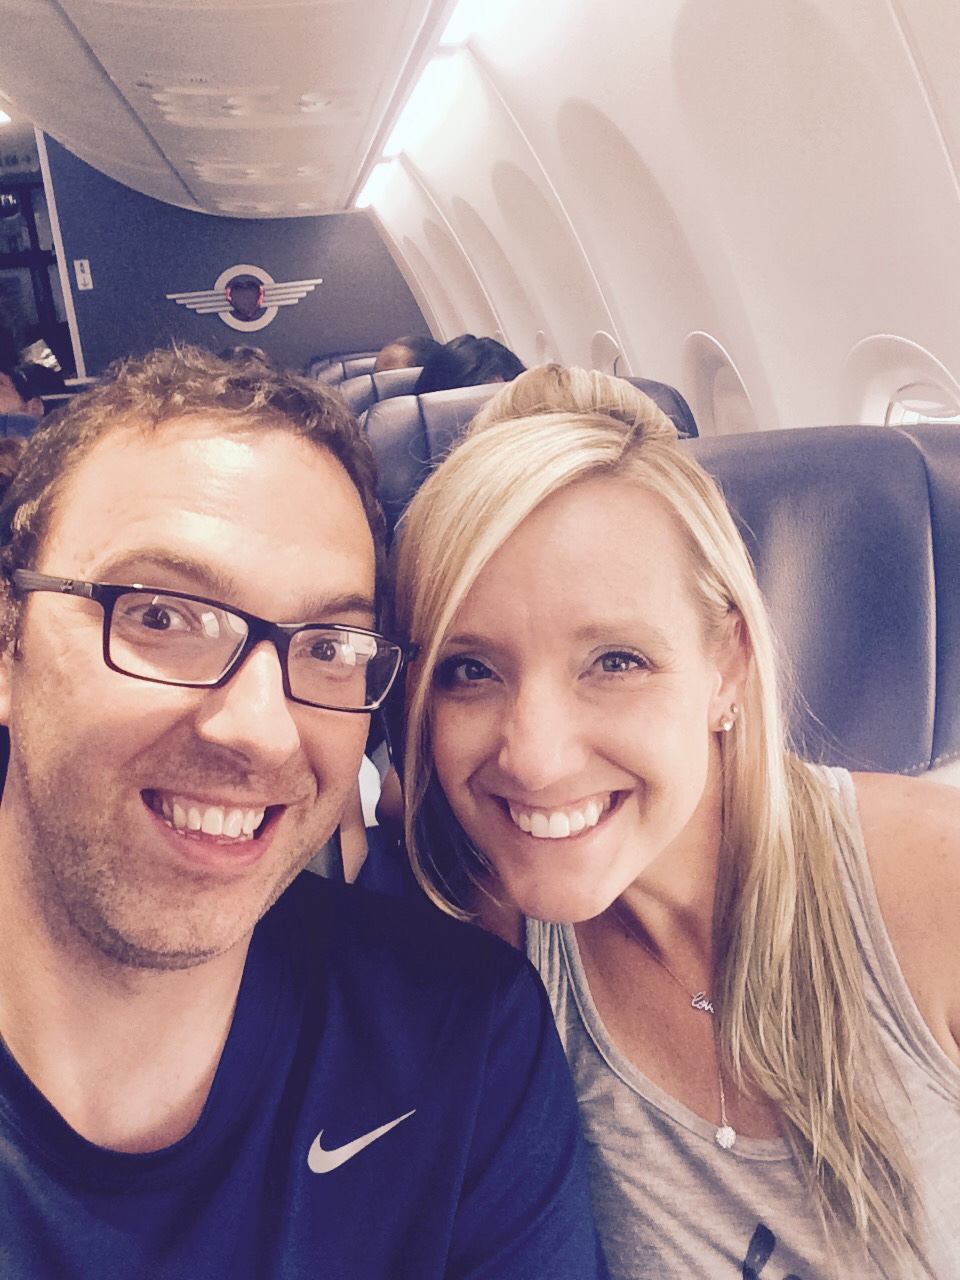
Summer of 2016. This is when I wholeheartedly became obsessed with our national park system. All it took was an airplane ride out from Chicago to Vegas, a tent, some basic camping gear you can fit in a suitcase, and an SUV. We joke that it felt like our “second honeymoon” because it was our first trip alone since being married 8 years prior (at the time) that we didn’t have any kids in tow.
When planning which parks we would visit from Vegas to Chicago, I followed along our home route and chose places that wouldn’t be too far off that route. I also took into consideration some parks which were our bucket list must-stops…Grand Canyon and Rocky Mountain. If I’m being completely honest, at the time of planning this trip in 2016, I didn’t know much about the national parks and couldn’t have imagined how profound of an impact this trip would have on our lives and future trips we would take with our kids. So if you have little experience with our national parks or aren’t quite sure that the “great outdoors” is for you, keep reading! That was ME in 2016! Who would have thought? With this trip being only one week, we had to pass up many parks for a later date. However, the 5 parks we chose for this trip made us fall in love with our country and all the beauty it has to offer and I’m confident you will, too. And if you have just one week for travel, this itinerary is perfect for you!

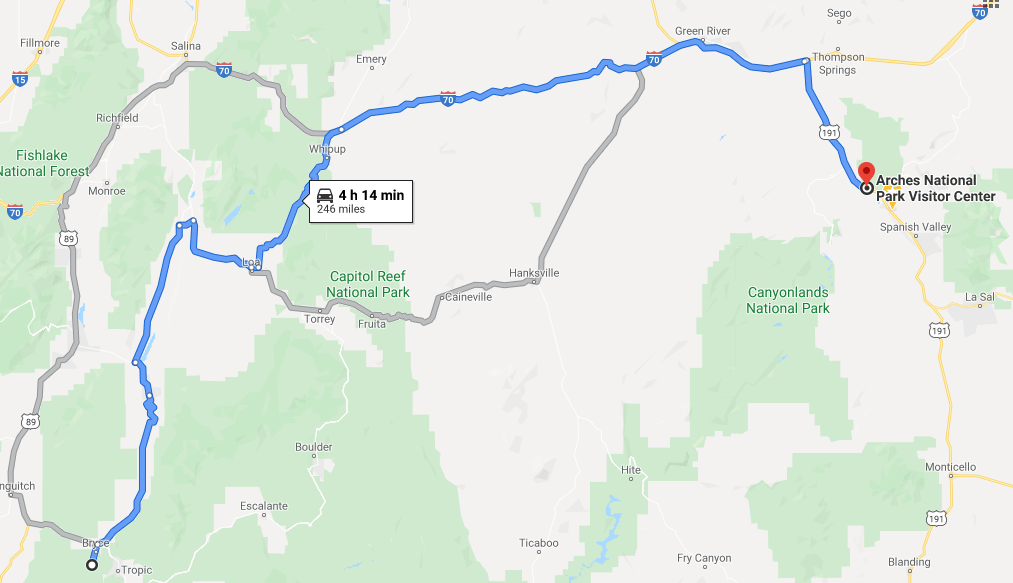
Below you will find info on the route we took and where we stayed from Vegas to Chicago, in one week! Of course, you can (and should) stay much longer at the parks we visited if you have the time. These are some crazy awesome parks! We only got a quick “taste” of each one as we had to get back to our kids and were traveling by SUV over 1,500 miles. But it was the trip of a lifetime, nonetheless!
We flew in from Chicago to Las Vegas at night, and picked up our car, which was not a rental. My husband’s uncle, who lived in Las Vegas, had recently passed at the time, and had left us his wonderful SUV. Without this incredibly humbling opportunity, I may have never researched the parks out west or have taken a trip like this. So, his uncle is VERY much a part of how we started our road tripping obsession in the first place, and we are forever grateful for him! We stayed overnight with family in Vegas, and prepared for our drive to the Grand Canyon in the early morning.
Stop #1
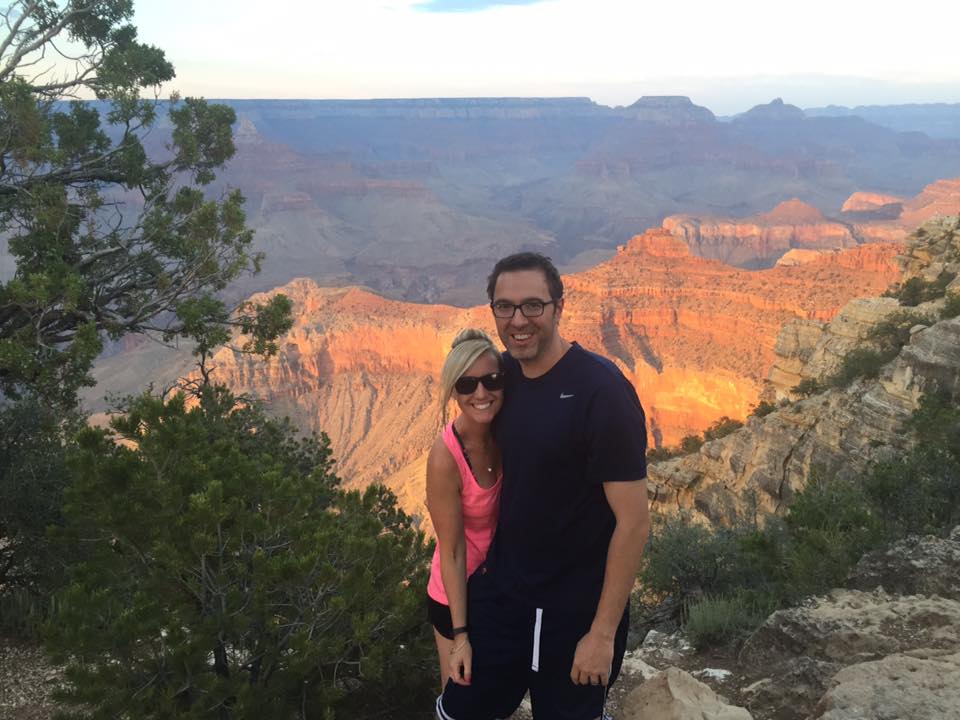
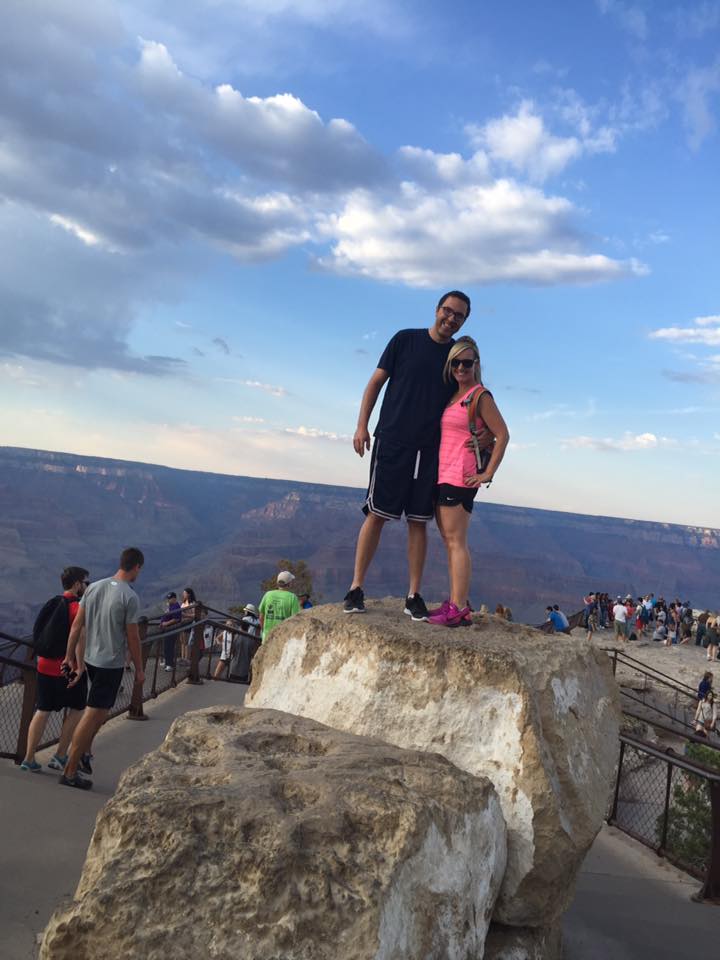
Grand Canyon National Park, AZ
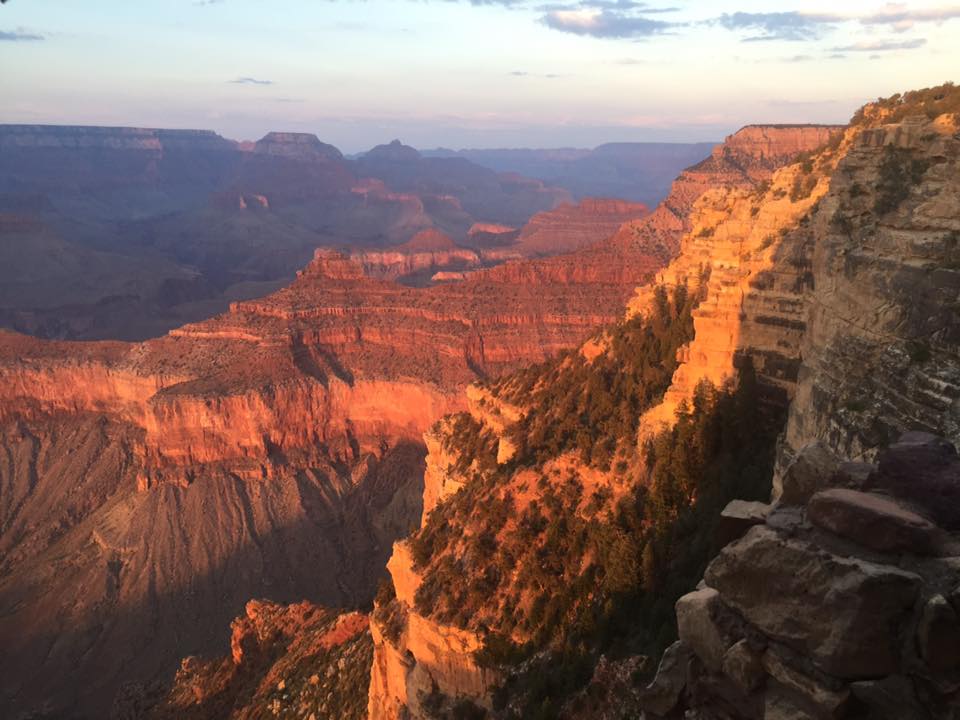
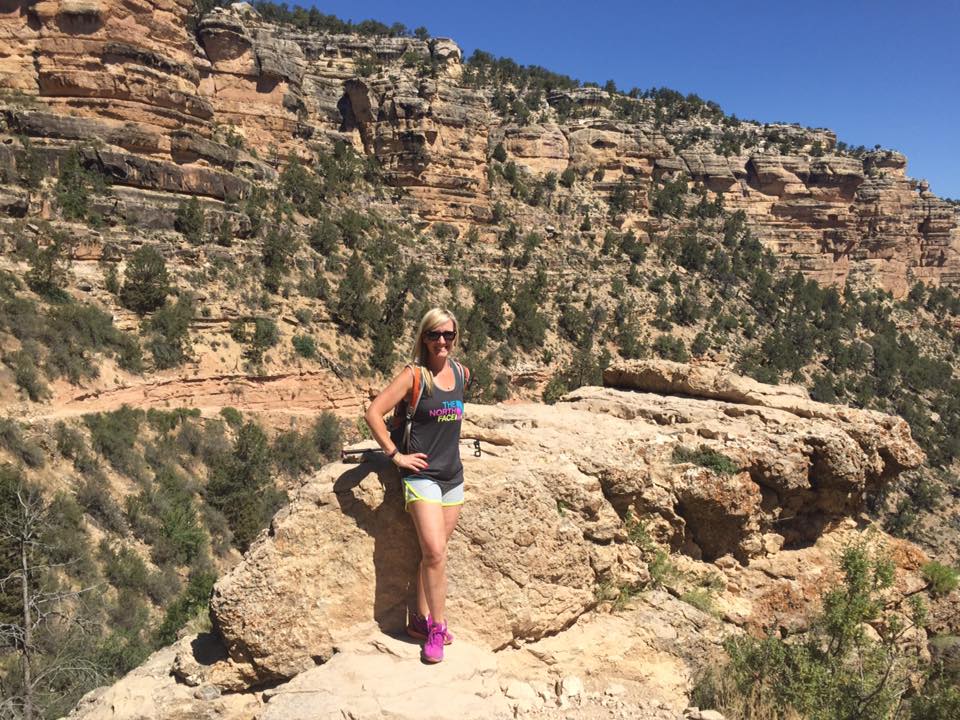
Why not start out BIG?! If you are looking at visiting a national park that will give you that “wow” factor, this IS the park for you. It comes at no surprise that the Grand Canyon is coined one of the Seven Natural Wonders of the World. Most will say that any pictures you see of the Grand Canyon will pale in comparison to actually seeing it for yourself. When I first laid my eyes on it, I almost cried it was so moving. Visiting this park immediately made me fall completely in love with the landscape and beauty of our country. There just aren’t words, really. We were here one day, and below is what I recommend seeing if one day is all you have. If time is on your side, I suggest staying at least 3 days to soak it all in thoroughly. We will return to this park in the summer of 2020, and I look forward to bringing the kids for their first time and exploring more of what this park has to offer and to give you updates! There are multiple entrances to this park with varying distances to get to them from Vegas, but the south rim is the most populated, touristy, and has the most hiking trails and amenities; including lodging if camping is not your thing! This post will refer specifically to south rim activities.
From Las Vegas, the Grand Canyon is about a 275 mile drive, or roughly 4 hours. When we arrived, we set up our tent at Mather Campground, which is within the national park at the south rim entrance. This campground is in close proximity to multiple trails, the visitor center, a market, and the shuttle service that runs within the park. Click for more info and making reservations up to a year in advance (highly recommended) at Mather Campground.

Looking for a tent? We ordered this one from Amazon, and when it arrived at our house, we left it in the box, unopened. We checked it on our flight, and picked it up as we would any other luggage. Easy! This is our favorite tent so far, because it opens up like an umbrella in 60 seconds or less! You don’t have to mess with poles and figuring out where the loops are. This came in handy when we entered one of the parks late at night. The setup was amazingly easy-going. You can purchase this tent here: Coleman 6-Person Cabin Tent with Instant Setup
Morning/Afternoon
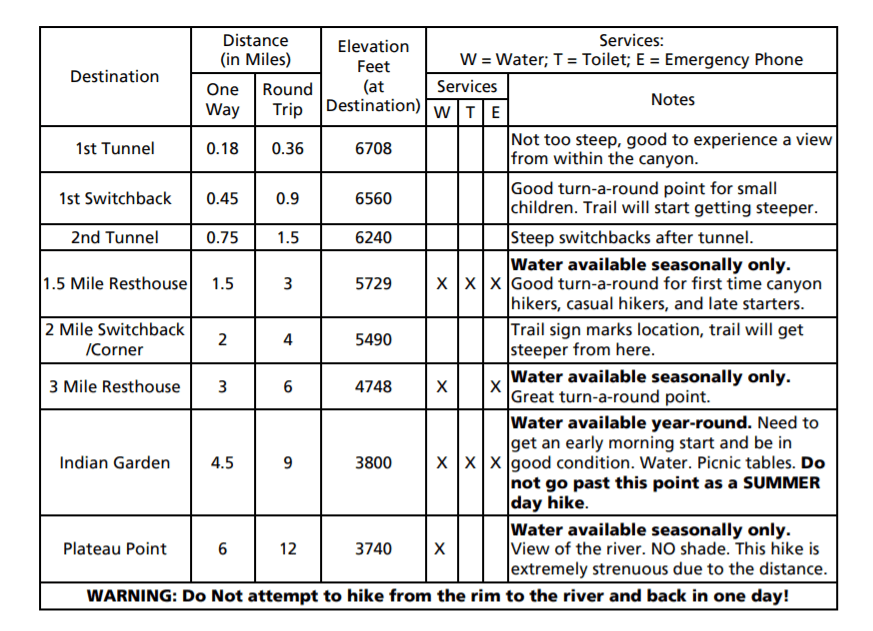
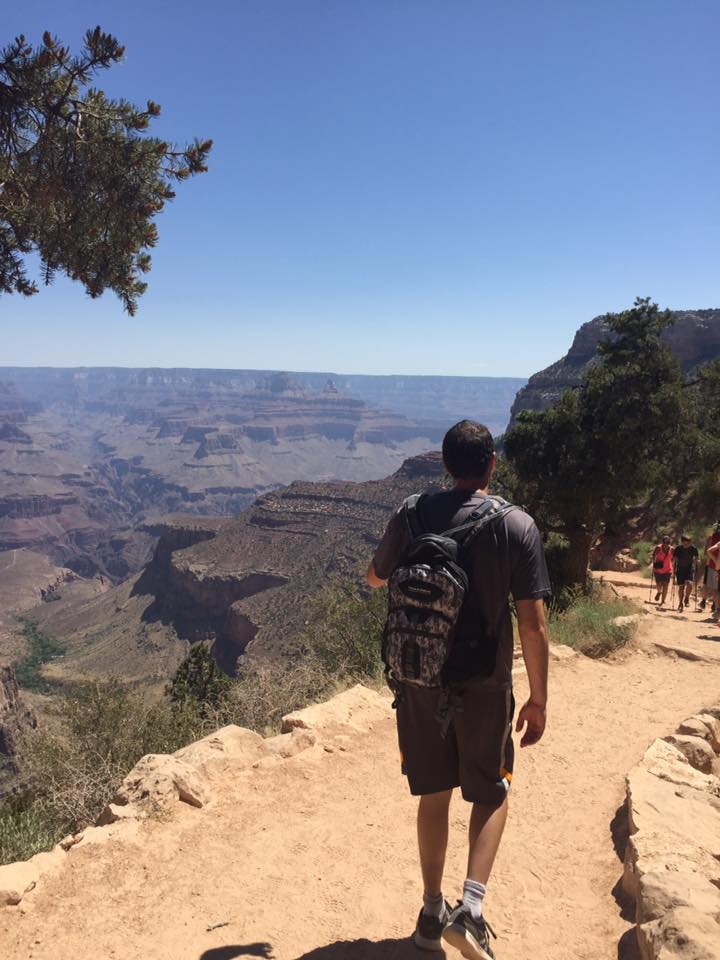
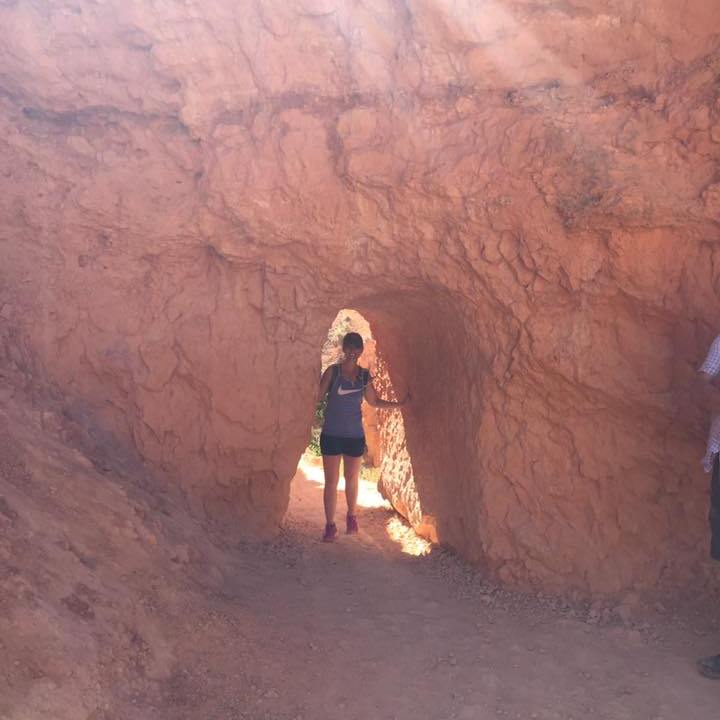
Bright Angel Trailhead (16 miles roundtrip): Grab a quick, but hearty breakfast (granola, oatmeal, ect..), lots of water, and head out EARLY to the trail, especially during the peak summer months when this trail becomes especially crowded and hot. This trail is located just west of Bright Angel Lodge. It is a steep hike into the canyon, but is well-marked and maintained. It is one of the most popular hikes in the park, with breath-taking views of the canyon. This hike continues to be one of my favorites out of all the national park hikes we’ve done. I felt this trail captured so much beauty of the canyon at every turn. It can become so easy to get lost in the scenery and sheer magnitude of the canyon. Please pay attention as to how far down you are hiking. This was one of the best pieces of advice from a park ranger as we began our descent. You can lose track of this because the hike seems so “easy” going down and hikers forget they have to hike back UP! Yikes! Allow yourself twice as much time to hike up as you hiked down. On this day, we hiked about 3 miles down (and then 3 miles back up). See the chart below from the park service in regards to turn around points along the trail. The trail is not recommended to be done in one day. If you are visiting in the winter or early spring, the trail may be dangerously icy. Learn more about this trail through the NPS: Bright Angel Trail

The first tunnel on the Bright Angel Trail
Remember to hike smart and hike safe! The national park service has many resources to keep visitors safe along the trail: Hike Smart and Safe
Along the Bright Angel Trail
Descending into the canyon on the Bright Angel Trail. We didn’t have trekking poles, but they would have come in handy!
Late Afternoon
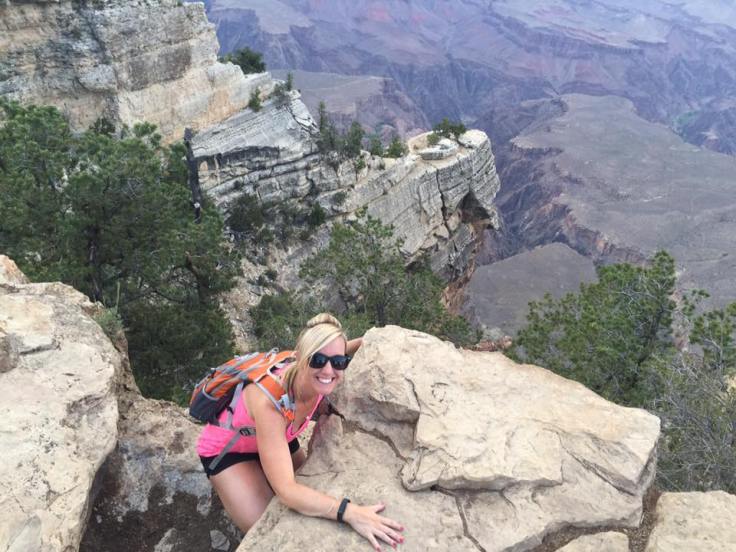
Rim Trail: Take an easy stroll along the Rim Trail. This trail (like Bright Angel) gets crazy close to the edge, so if you have kids, keep them close to you. The trail is well-defined and wide so you don’t have to get THAT close. You can walk as far as you’d like and turn around when you are feeling tired, but the entire length is about 13 miles. We made sandwiches and ate along the trail when we needed a break. As far as taking pictures here, I can’t think of one bad place to take one! Every step of the way is picture worthy! Make sure you stop and rest, and take in the views! Learn more about this trail from NPS: Rim Trail

Evening
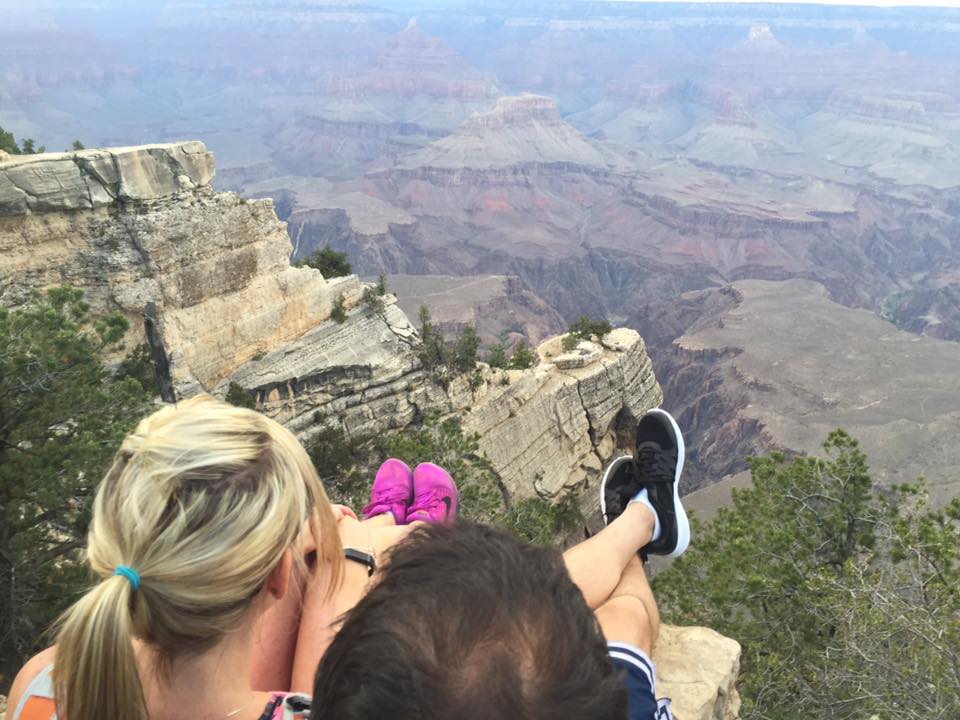
Sunset Views at the Grand Canyon: A visit to Grand Canyon would not be complete without witnessing the sunset at one of the lookout points along the rim trail. It is incredible! This is a MUST DO. Mather Point is a popular one and is located behind the Grand Canyon Visitor center. Other places to take in the sunset include: Hopi Point, Mojave Point, and Pima Point (all located west of Verkamp’s Visitor Center, near Hermit’s Rest, along the rim trail).
Sunset at the Grand Canyon
Mather Point
Have more time? Check this out!
- Trail of Time. According to the NPS, “the Trail of Time is an interpretive walking timeline that focuses on Grand Canyon vistas and rocks and invites visitors to ponder, explore, and understand the magnitude of geologic time and the stories encoded by Grand Canyon rock layers and landscapes. The exhibit follows the existing paved rim trail on the South Rim of Grand Canyon between Yavapai Observation Station and Grand Canyon Village and is marked by brass markers every meter, representing one million years of time.” Trail of Time
- Participate in the Junior Ranger Program: We do this when we have kids in tow. The NPS has built an AMAZING program for kids at all the national parks. At the Grand Canyon, pick up a Junior Ranger guide at one of the visitor centers and participate in the activities in the booklet that coincide with your child’s age. Once completed, return the booklet to a ranger at the visitor center, and your child will get a Junior Ranger badge! Also, check out the geological history talks, critter talks, and seasonal special events. All programs through NPS for kids are free. Junior Ranger Program Special Events
- Mule Trips. View the Grand Canyon by mule! Mule Trips
- River Trips. You can book up to an 18 day river trip! River Trips
- Guided Tours (including bike tours) Guided Tours
Stop #2
Zion National Park, UT

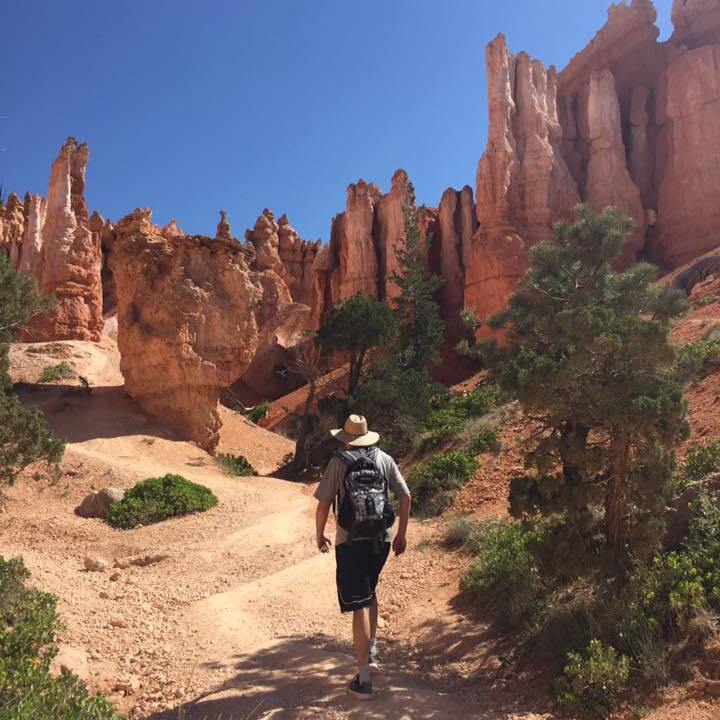
Zion National Park! This is Utah’s first recognized national park. I cannot believe I had never heard of this park until 2016. Looking back now, it is crazy to think how much I have learned about our park systems since then. This is one of my favorite parks of all time. You must make this a priority stop when you make your way out west!
Zion is 250 miles northwest of the south rim at Grand Canyon. Below is what we did during our time here! We really packed in A LOT! This park is one of Utah’s “Mighty Five” national parks, and the most visited park in Utah, with over 4 million people visiting annually. Summers get hot here, so the earlier you visit in summer, the better! Summer is also peak season for all Utah parks, so it gets crowded. Very crowded. Begin your hikes early in the day to avoid crowds…and heat!
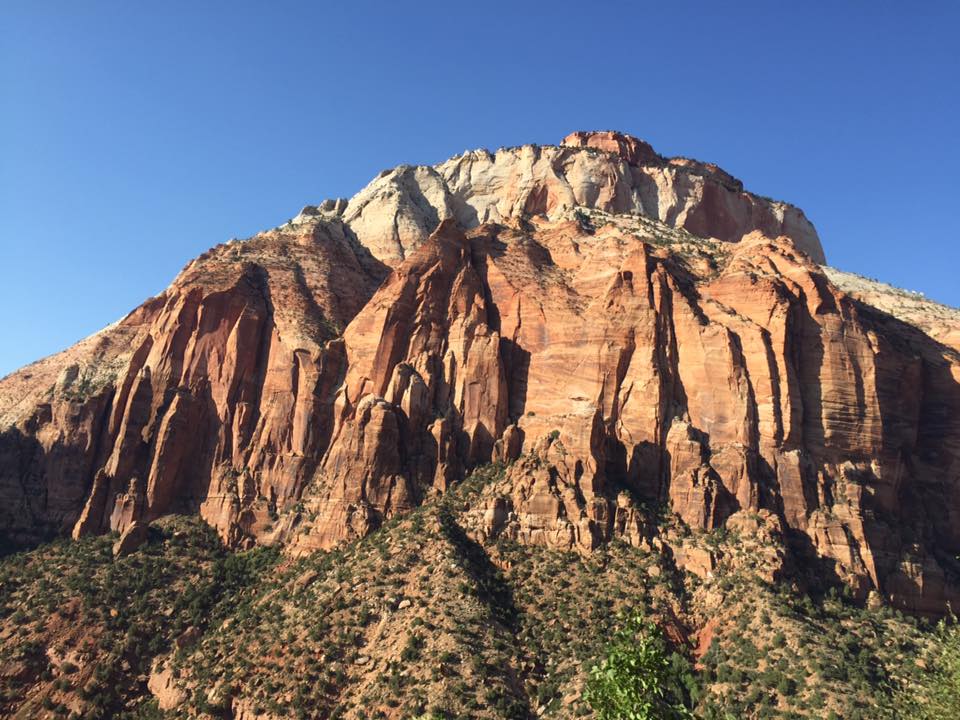
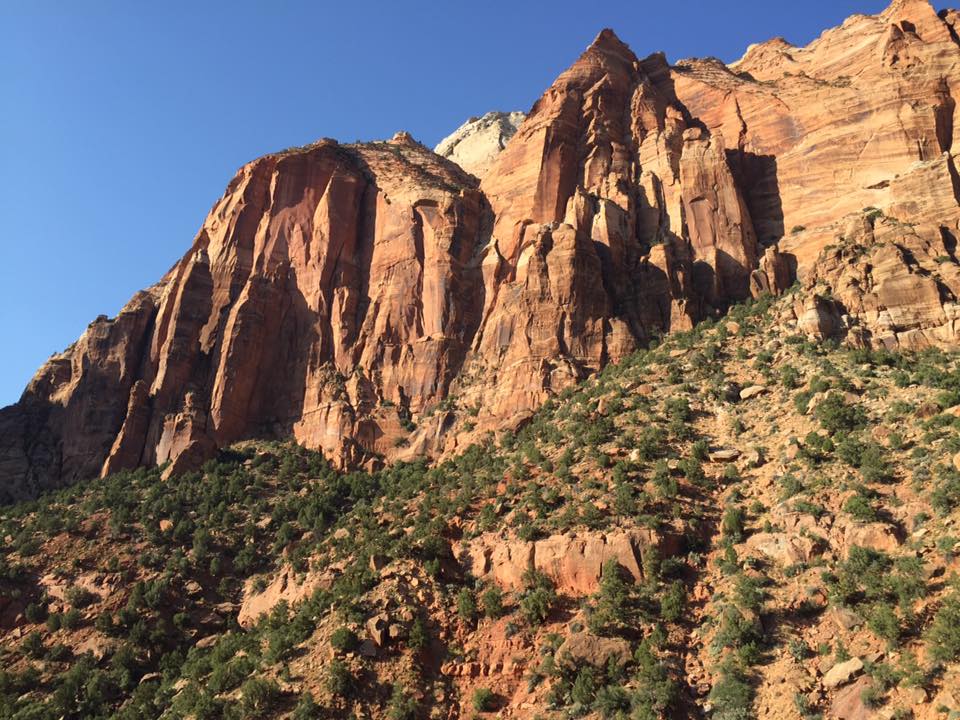
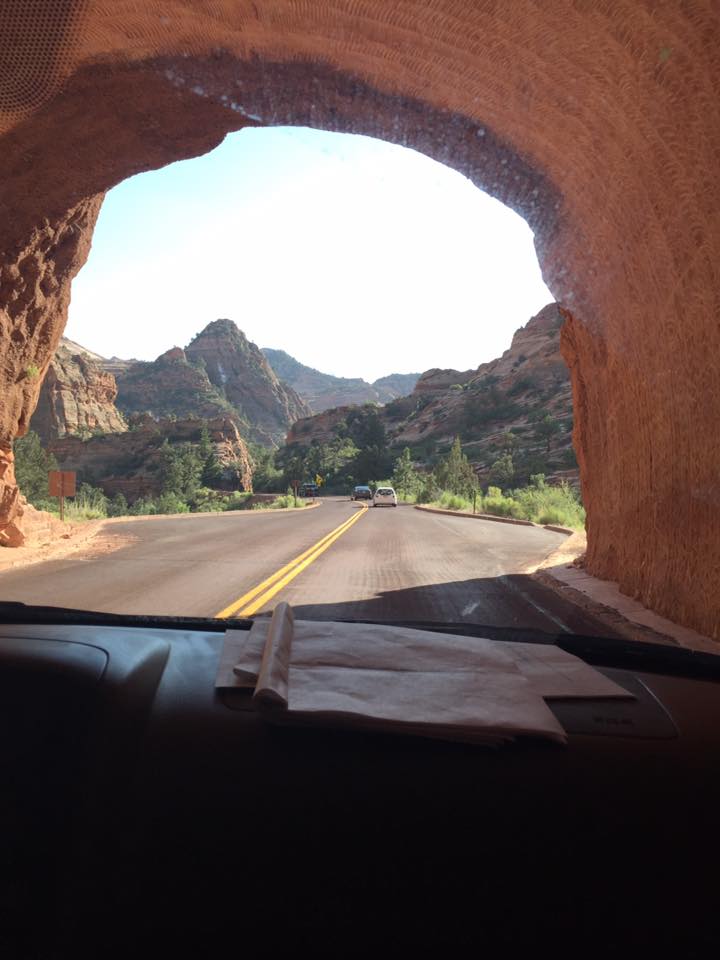

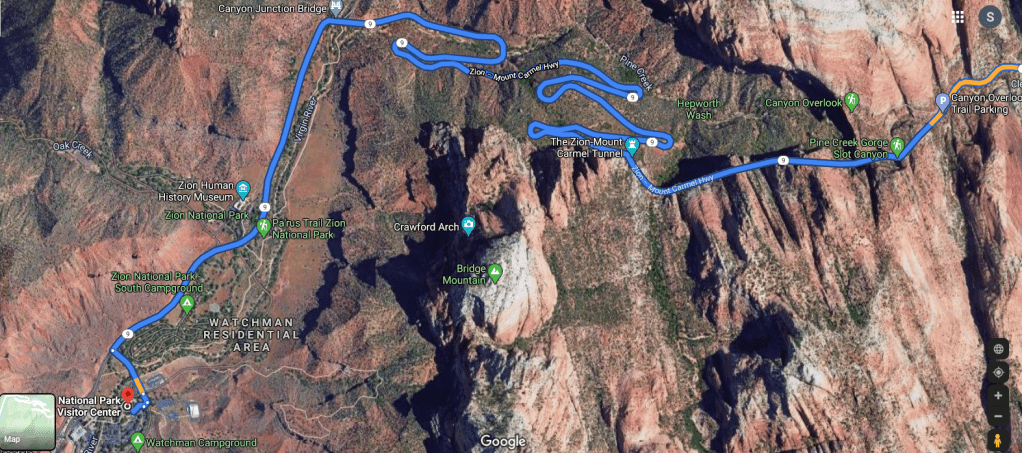
The views on the way into the park from the east entrance are absolutely breathtaking! We entered this way so that we could experience the winding series of switchbacks into the park on Mt. Carmel Highway 9 and then make our way through the historic mile long Mt. Carmel tunnel. If you take this way, be sure to stop at Canyon Overlook before entering the tunnel! To learn more about the history of Mt. Carmel Highway 9 and the Mt. Carmel Tunnel, check this out: History of Mt. Carmel Highway
Tunnel Information
We did not camp at this park, though there are several highly rated campgrounds close to the visitor center near Springdale, a town surrounded by the park with many restaurants, shops, and accommodations. If you have an RV, it might be easier to avoid the tunnel and travel into the park through Springdale via Route 9 from the south if your RV dimensions are cutting it close.
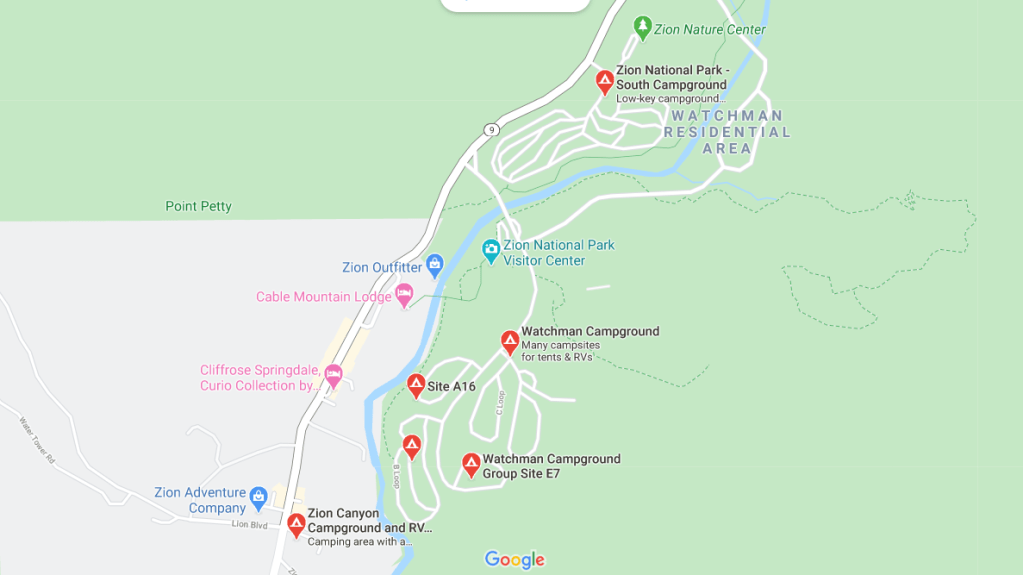
We stayed at a B&B in Springdale called, Under the Eaves Inn, and it was wonderful. Very accommodating and friendly hosts, and the grounds were clean, quaint, and reminded me of a cute fairy tale cottage! This place was also in a great location; walking distance to shops, restaurants, and the shuttle! Oh, and did I mention that the hosts give you a voucher for a nearby restaurant for breakfast? We used ours for Oscars Cafe…it was sooooo good! We had a hearty breakfast here before venturing out for a full day of hiking and exploring! We took the shuttle into the park after breakfast. There are several free shuttle stops in Springdale, but we took the one conveniently located across Rt. 9 (Shuttle Stop #5) and 0.1 miles from Oscar’s Cafe near Zion’s Bank.
Zion Hiking Trails
Our itinerary consisted of enjoying 3 beautiful hikes. They are listed in the order we hiked them. We packed a sandwich and snacks, and LOTS of water. On this day in mid-June, the temperature reached 101 by midday! After a full day of hiking, we had dinner at one of the local restaurants in Springdale.
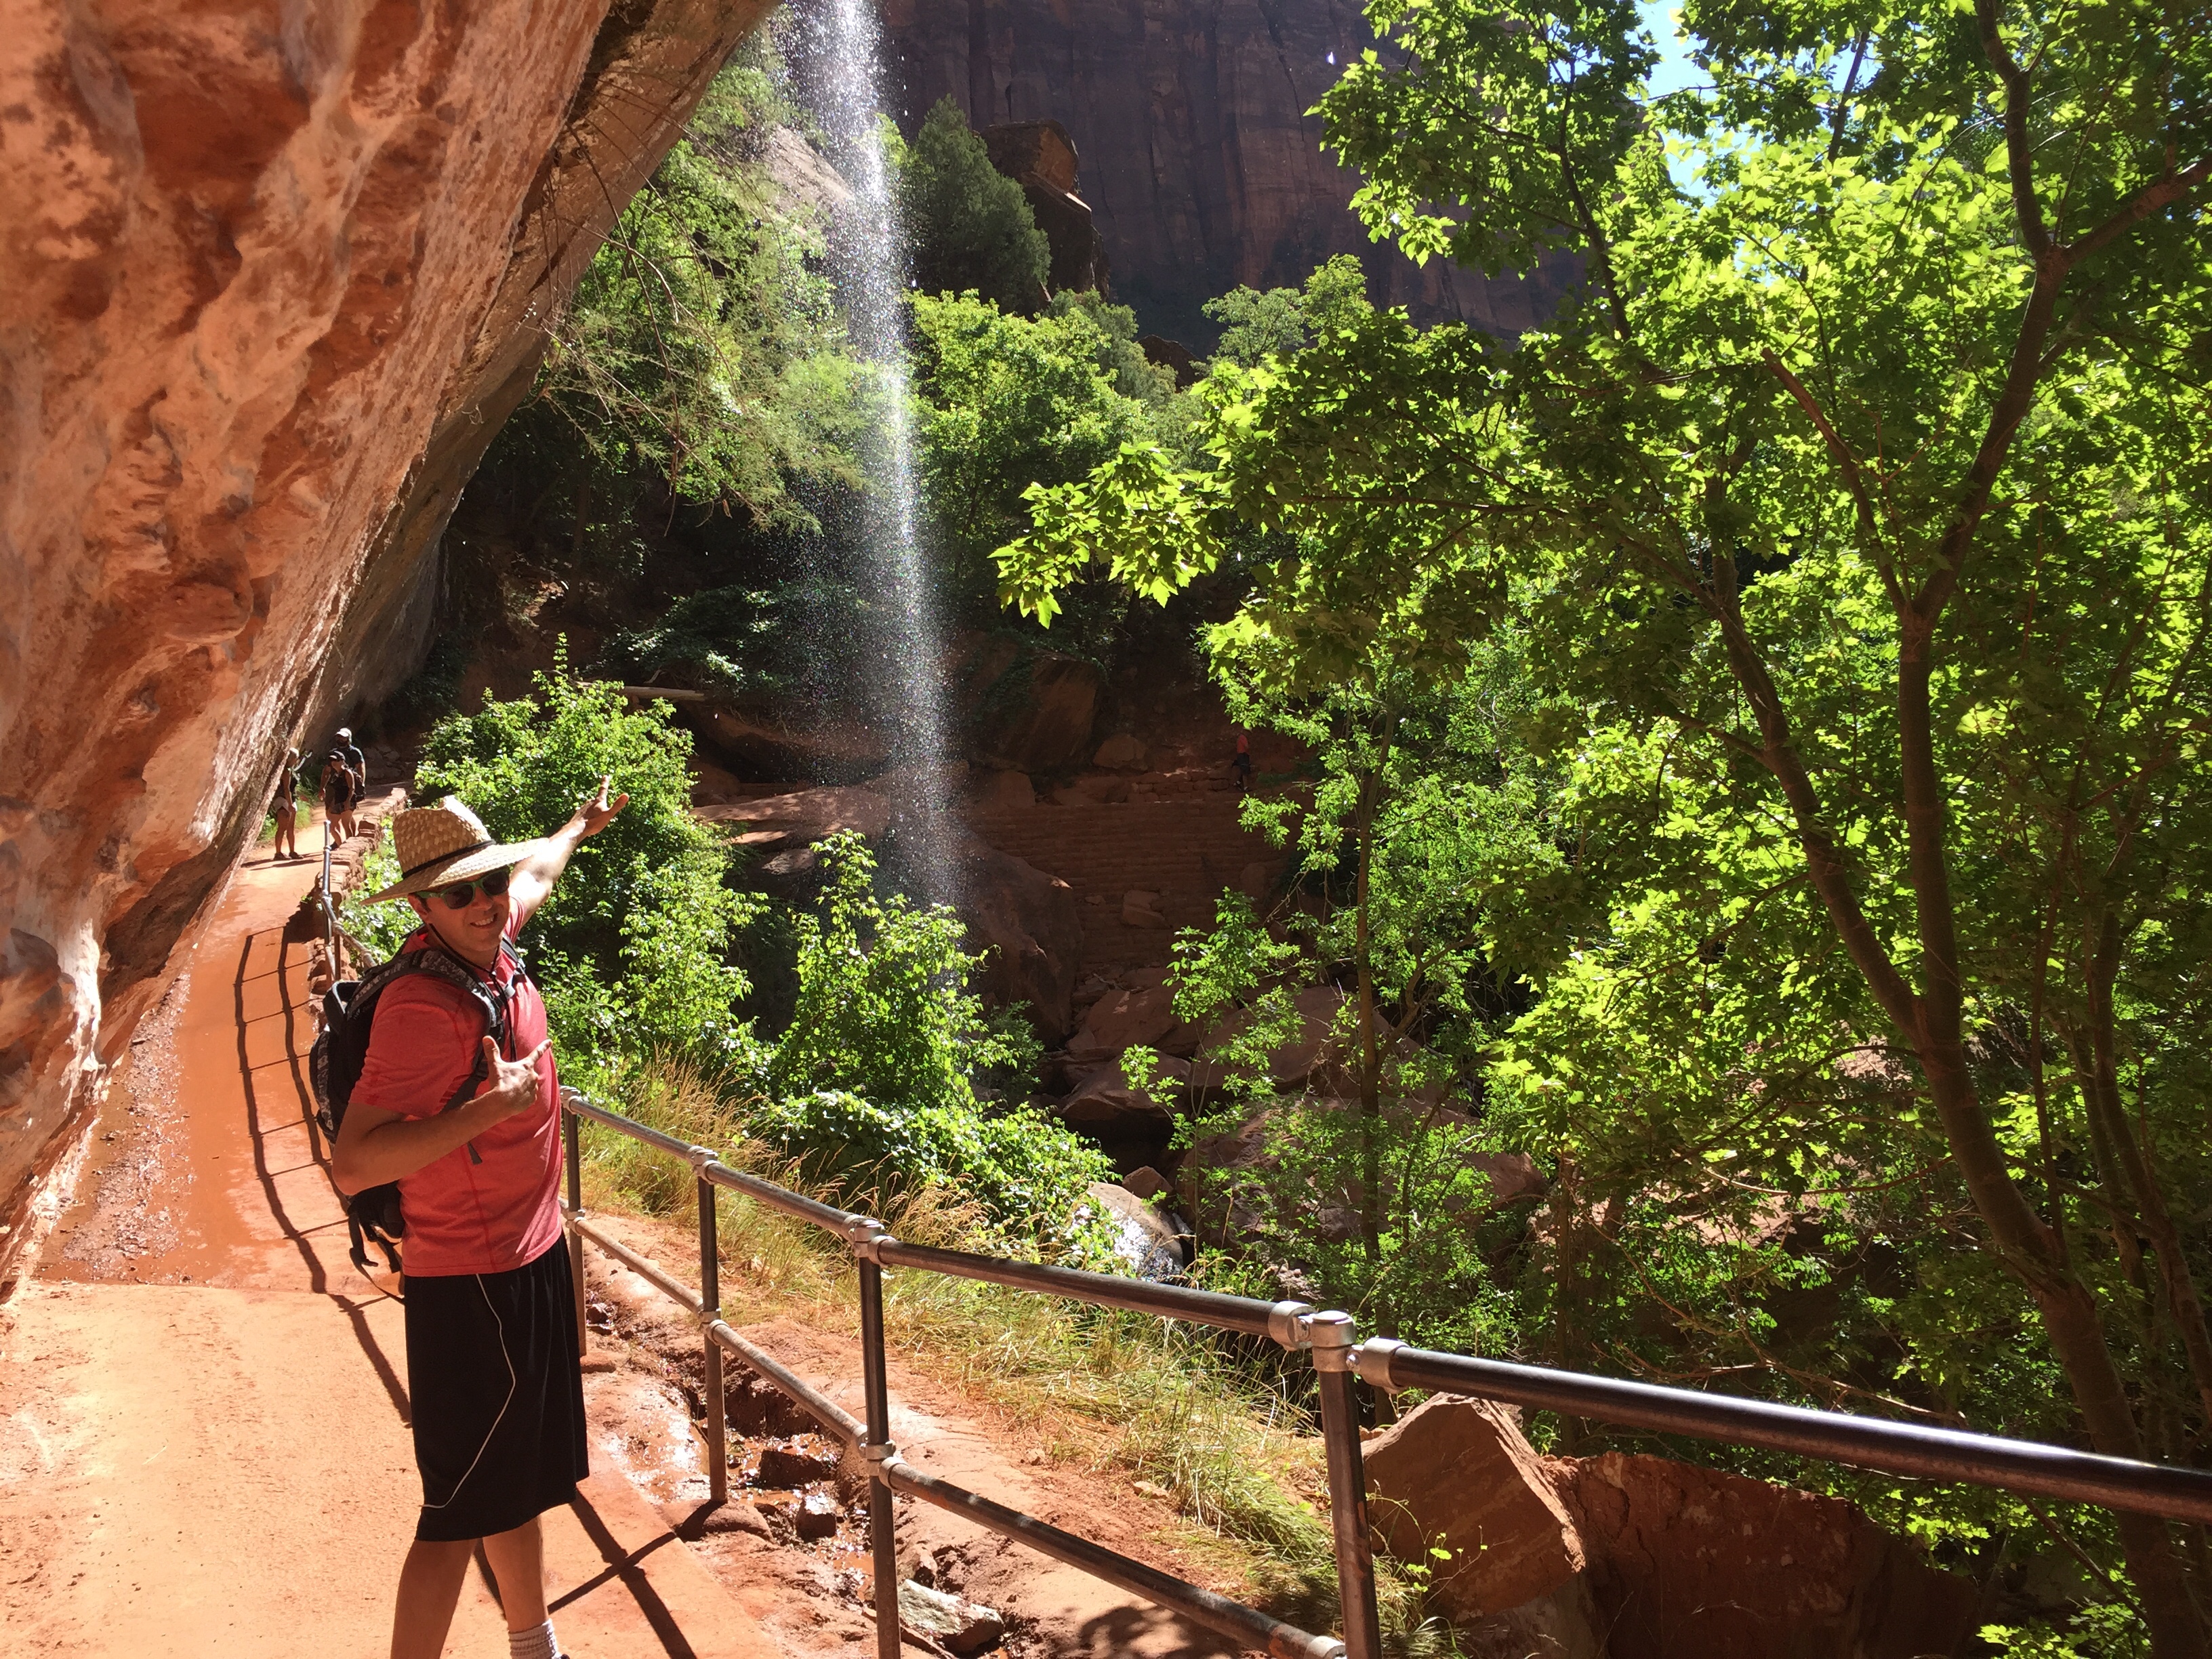 Weeping Rock Trail (0.4 roundtrip): This is the shortest hike in the park, and is great for kids. It is an easy hike, with stairs and some steep inclines going up; mostly paved though not wheelchair accessible. Along the trail, you can see lush hanging gardens, and a steady stream of water trickling down from Weeping Rock. If there is enough water, you can even see a waterfall! If you decide to go under the alcove, expect to get a little wet! It was refreshing on a hot summer day!
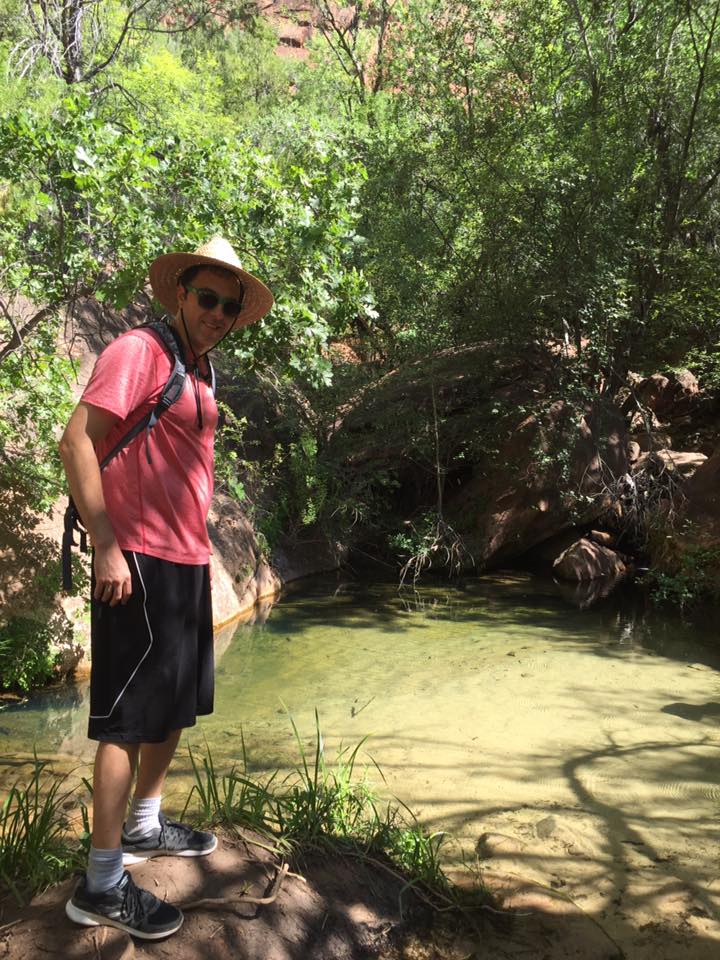
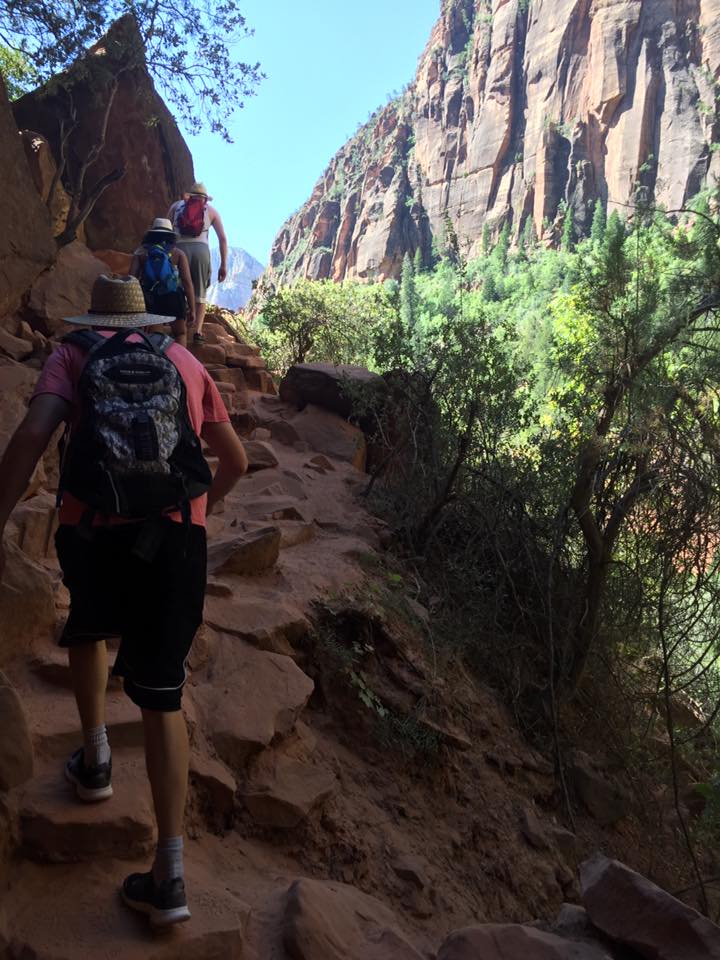
Emerald Pools Trail (about 2.5 miles roundtrip): This trail begins at the Zion Lodge Shuttle Stop 5, and has a series of pools at different points along the trail: lower, middle, and upper pools. You can hike to all three, or just one or two, depending on how you feel! The pools are at the base of a weeping wall or even a waterfall, depending on the time of year. This trail contains steep inclines, rocky stairs, and some parts that are narrow along cliff edges. Throughout the trail, you will see magnificent views of the park and mountains. This was one of our favorite hikes in the park! The hike to the Lower Emerald Pools is 1.2 miles roundtrip, and to continue to the Upper Emerald Pools is another mile roundtrip.
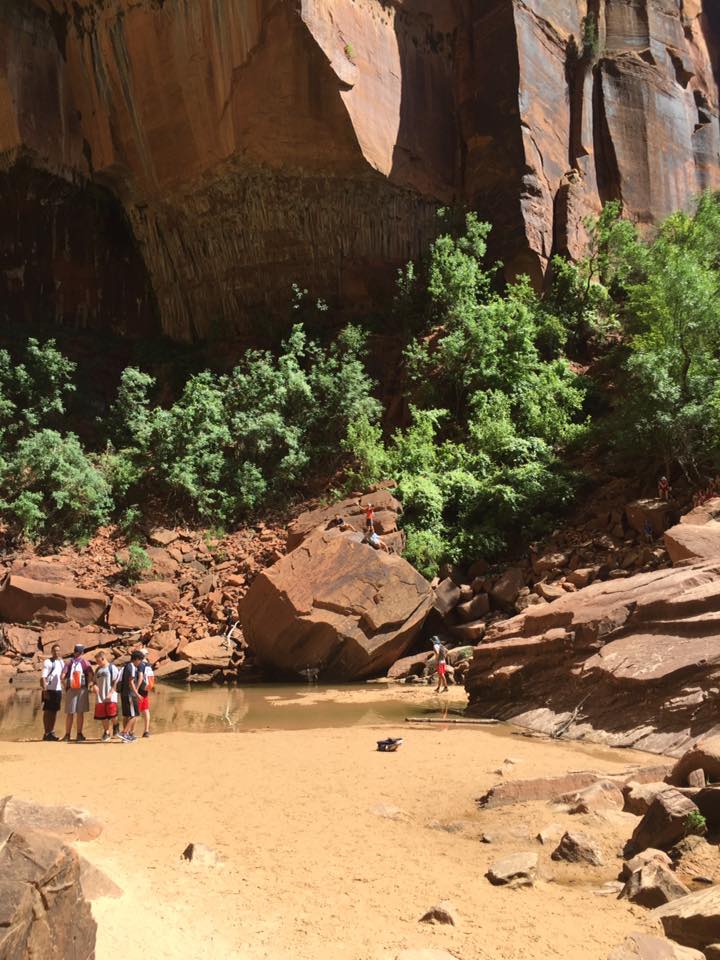
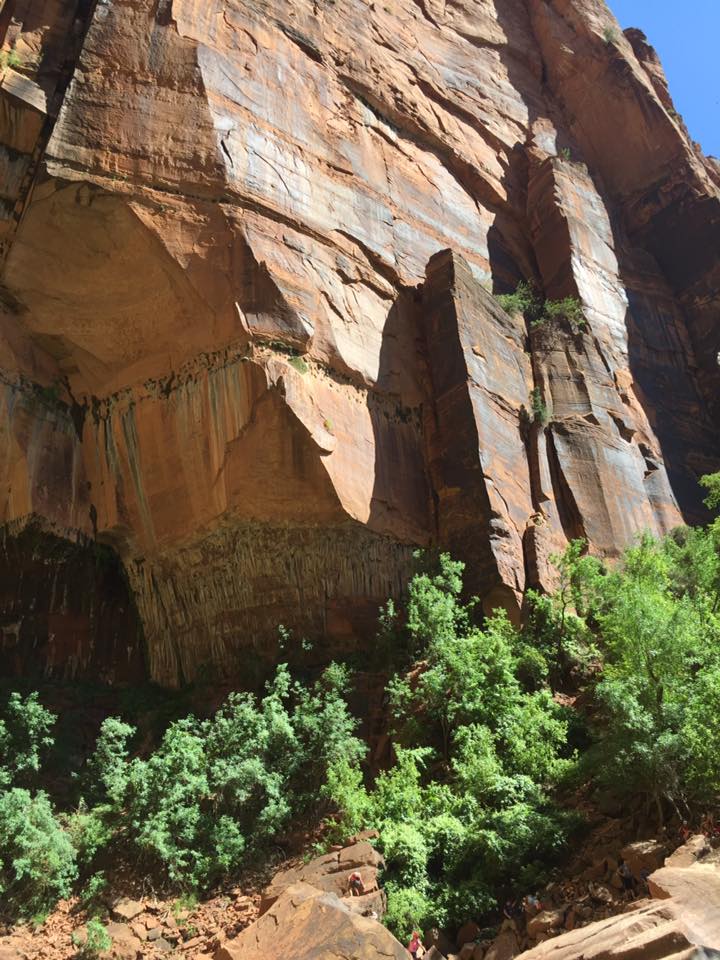
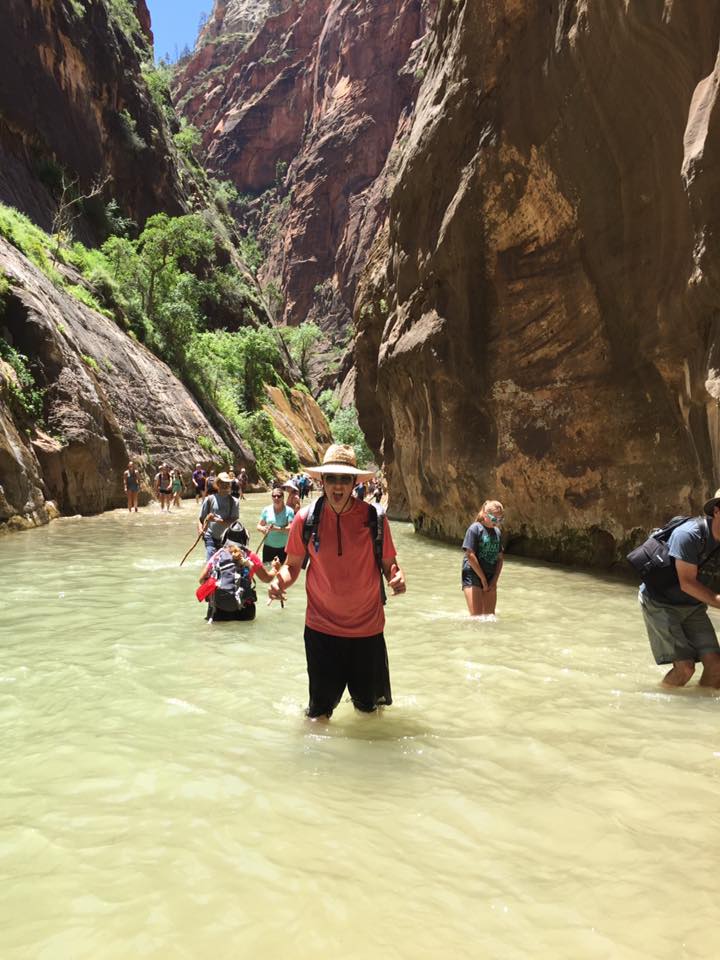
The Narrows (9.4 miles roundtrip) and Riverside Walk Trail (2.2 miles roundtrip): The Narrows is BY FAR one of the most exciting hikes we’ve done, and we have completed LOTS of trails throughout the 30 national parks we’ve visited to date. To get to The Narrows “trail,” you will take the Riverwalk Trail. This is an easy, paved, wheelchair accessible trail that follows along the Virgin River. To experience The Narrows, you will have to get into the Virgin River. Appropriate attire is a MUST! We were definitely not prepared for this hike and wore gym shoes…NOT recommended! Wear waterproof, hard-soled shoes with good grip and invest in trekking poles for stability and balance, along with proper attire! The water level can change at any time as you are wading through the water trail, and the rocks are slippery. Trekking poles allow you to foresee the depth as you move forward. In some places, the water was chest deep. You can rent shoes and poles for this hike at the national park as well. I also recommend getting some sort of waterproof bag for your items, especially phones and cameras.


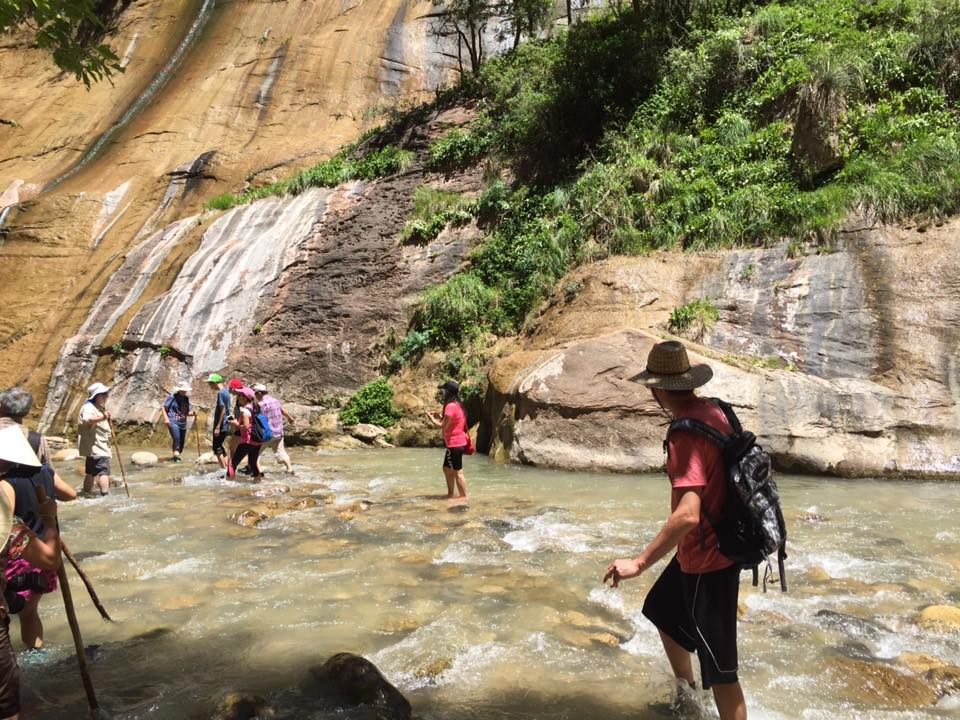
The Narrows? What’s that? According the the NPS, The Narrows is the narrowest section of Zion Canyon. This gorge, with walls a thousand feet tall and the river sometimes just twenty to thirty feet wide, is one of the most popular areas in Zion National Park. You can see The Narrows by hiking along the paved, wheelchair accessible Riverside Walk for one mile from the Temple of Sinawava. If you wish to see more, you will be walking in the Virgin River. This can involve wading upstream for just a few minutes or it can be an all day hike. A hike through The Narrows requires hiking in the Virgin River. You must get your feet wet since there is no trail. Most people choose to start their hike from the Temple of Sinawava via the Riverside Walk and then walk upstream before turning around and hiking back down to the Temple of Sinawava.
Though this was a super exciting hike, it can also be dangerous. The best time to get in the water is in late spring or summer when the water is warmer, but this is also a time when flash floods can occur. Also, currents can get very strong here, and if they become too strong, The Narrows will close. Please check Planning Your Visit to The Narrows for the most updated information on closures and more information for hiking this trail during your planned stay.
Check out this informative video from Zion Adventure Company on hiking The Narrows!
There are MANY other hiking trails in Zion National Park, but we did not have time for the others. You can easily spend multiple days here exploring! One hike we were not brave enough to do this time, but is one of the most famous hikes in all of the national parks is Angel’s Landing. If you are not afraid of heights and enjoy an adrenaline rush, I highly suggest this 5.4 mile round trip hike at Zion! I would absolutely not recommend this hike with young children, as there are extreme drop offs, and the end of the hike requires the use of holding onto chains to climb the last part to the top.
How about taking an ehike of Angel’s Landing? The NPS did a great job of capturing the magnificence of this hike! Take an ehike of Angel’s Landing or you can watch this video clip to see the sheer drop offs and chains to get to the top from the Americas Parks YouTube Channel!
You could honestly spend a week hiking in Zion National Park! You can enjoy hikes at Zion Canyon (most popular hikes), Kolob Canyons, and the Wilderness (longer hikes and some require a permit). For a full list of hikes in Zion National Park from the park service, click here! Zion Hikes
Stop #3
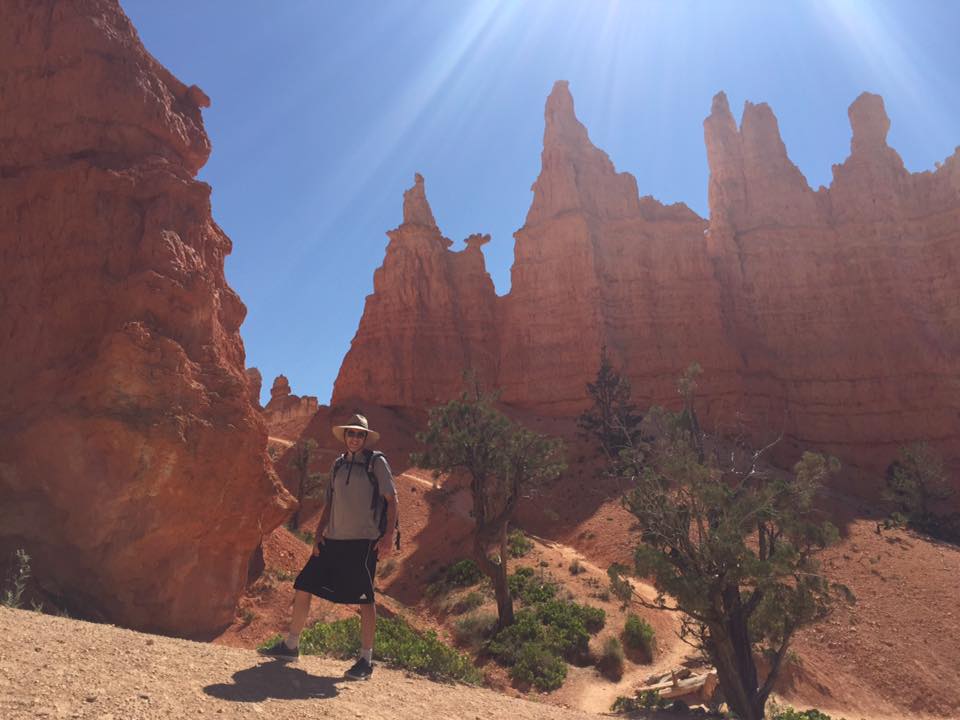
Bryce Canyon National Park, UT

We didn’t know what to expect when we entered the parking lot at Bryce Canyon. We had just left Zion the day before, and was pleasantly surprised to find the parking lot of the visitor center not full when we arrived around 10:00 am. After the crowds at Zion, we enjoyed not having to look around for a parking spot and enjoyed the peacefulness here. We found that just because Bryce Canyon wasn’t as crowded (though it did get crowded later in the day), that didn’t mean it wasn’t just as beautiful. We absolutely loved it here, and highly recommend you make the stop! From Zion, you will take US-89 N and then UT 12 E, getting off at UT 63 S. It is 86 miles to the Bryce Canyon Visitor Center.
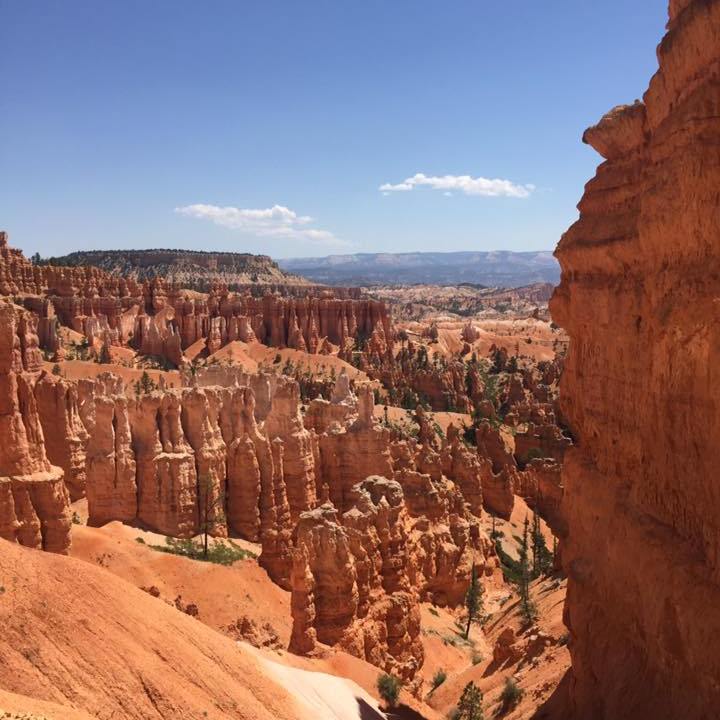
Bryce Canyon is not just one canyon, but rather a series of natural bowls carved into the edge of a high plateau at the top of the Grand Staircase. Upon entering the park, you can’t help but notice the irregularly shaped spires, or hoodoos, that stick out of the ground. Here, you will find the largest concentration of hoodoos in the world!

Our itinerary for the day consisted of multiple, easy to moderate hikes, and then dinner at a local restaurant before heading to our hotel. Below are the hikes we did.
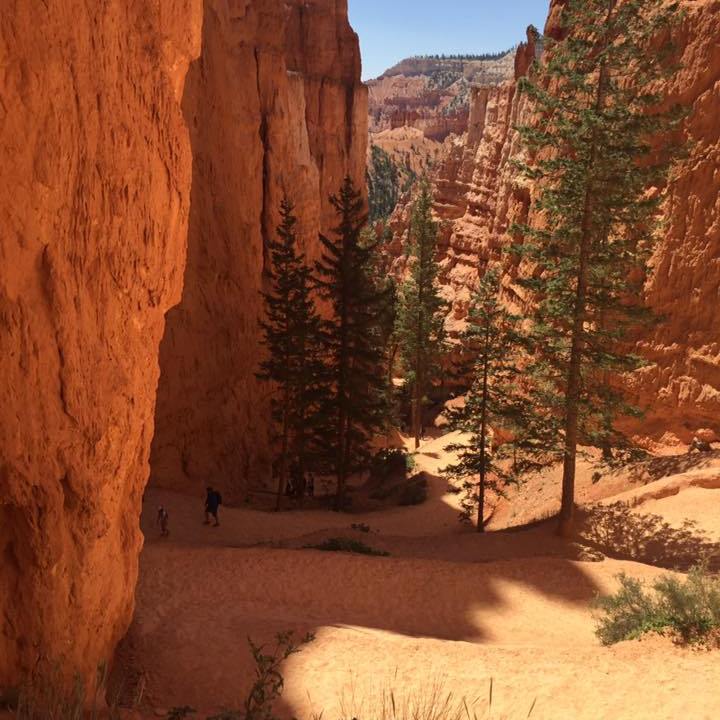
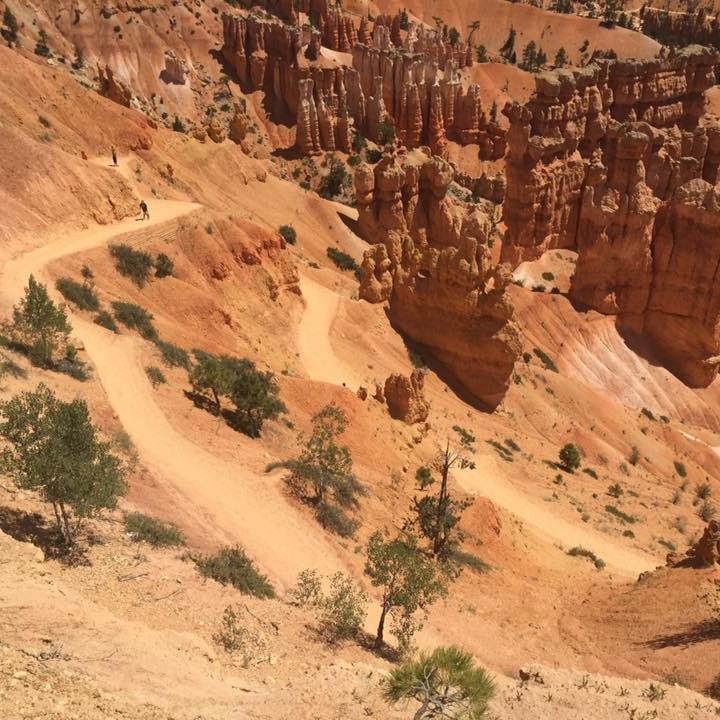
Rim Trail (0-11 miles): We picked up the Rim Trail behind Bryce Canyon Lodge. This trail extends from Fairyland Point to Bryce Point (5.5 miles) and has several steep elevation changes. At the intersection of the Rim Trail and the start of the Queens Garden Trail, you can view one of the most spectacular viewpoints in all of the park, Sunrise Point. We stopped to breathe in the fresh (and hot) air here, and enjoyed the sweeping views of Fairyland Canyon and the magnificent hoodoos.

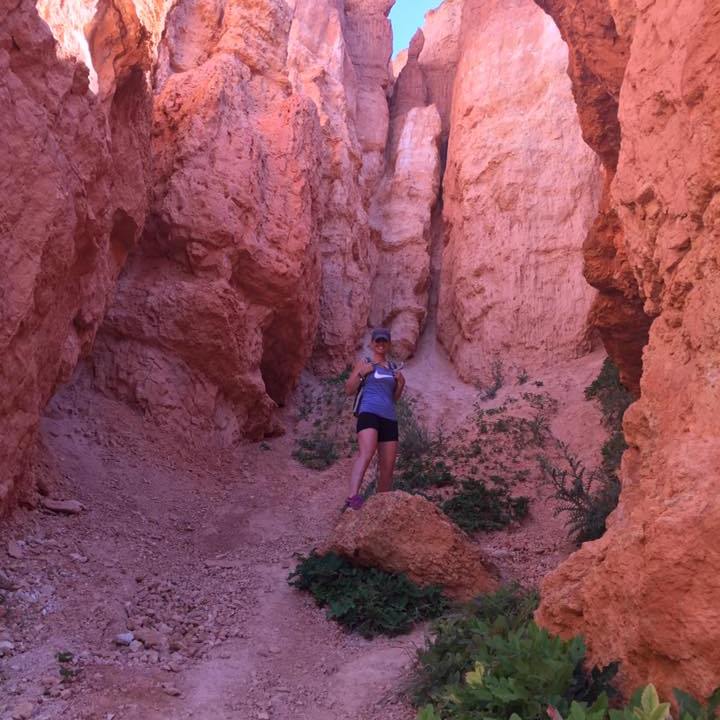
Queens Garden Trail (1.8 round trip): Beginning at Sunrise Point, this trail descends 320 feet and is considered the least difficult trail entering the canyon from the rim. There are no shortages of viewing hoodoos along this trail. They look like gardens of flowers! Along this trail, you may be able to see Queen Victoria at the end of a short spur trail, overseeing the garden. We captured a pretty good shot of her! Do you see her sitting on her throne in the distance with a beam of light shining down on her? Queens Garden Trail
The Navajo Loop (1.3 miles): This loop actually begins at Sunset Point and goes down into Bryce Amphitheater through a “slot” canyon, but we picked up the Navajo Loop at the end of the Queens Garden Trail, and headed north back toward the Rim Trail. You will have a steady uphill climb out of the canyon. The trail is well marked and you will see many hikers along this trail.


Camping at Bryce Canyon
We just loved our hikes at Bryce Canyon and highly recommend making a day trip here. Honestly, you could even drive here if you are staying near Zion for just the day and not worry about lodging near Bryce. We realized there weren’t many options here, and because we tried to book too late at the campground, we had to stay in a hotel. We stayed at America’s Best Value Inn, which is now called Red Ledges Inn, in Tropic (little town next to Bryce). It was a basic hotel with free breakfast, and met our needs for one night. We had dinner right next door at i.d.k BBQ and I highly recommend this restaurant. If you would like to camp, I would take advantage of the six month window to book your campsite here at Sunset Campground (it accepts online reservations), or any national park campground you plan to stay at along your trip for that matter (some parks allow booking campsites and lodges up to a year in advance). Camping at Bryce Canyon.
Bryce Canyon has two campgrounds:
North Campground: This campground has 99 sites all available on a first-come-first-serve basis. Loop A of this campground is open year-round. North Campground Map
Sunset Campground: This campground provides 100 sites available April – October with peak-season reservations through the recreation.gov site. This campground also has options for groups/group sites, which are also able to be reserved online. Sunset Campground Map
Stop #4
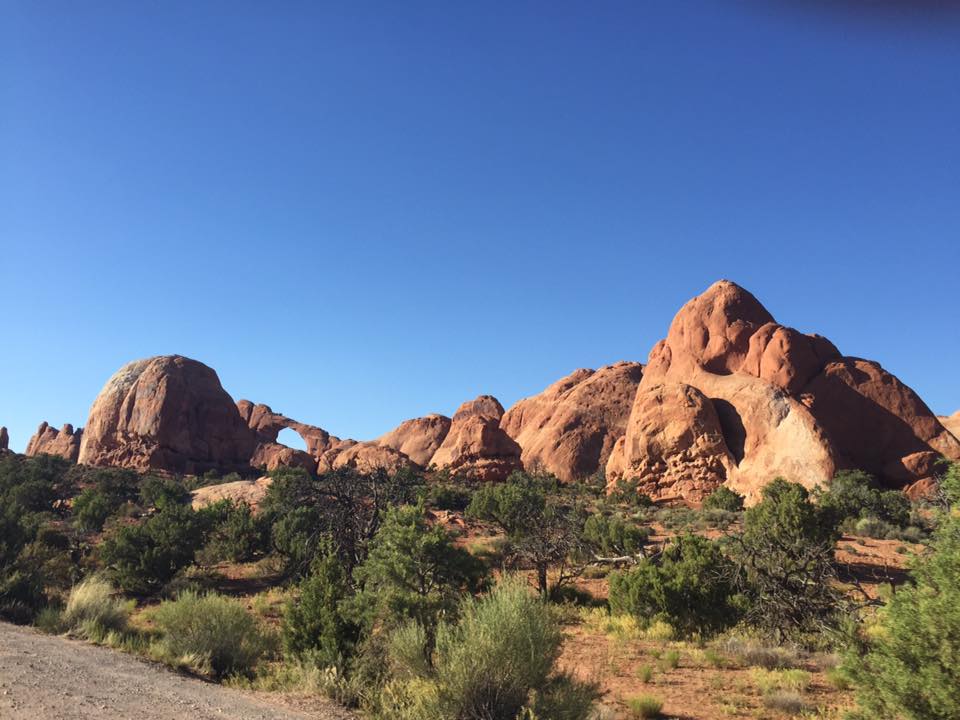
Arches National Park, UT
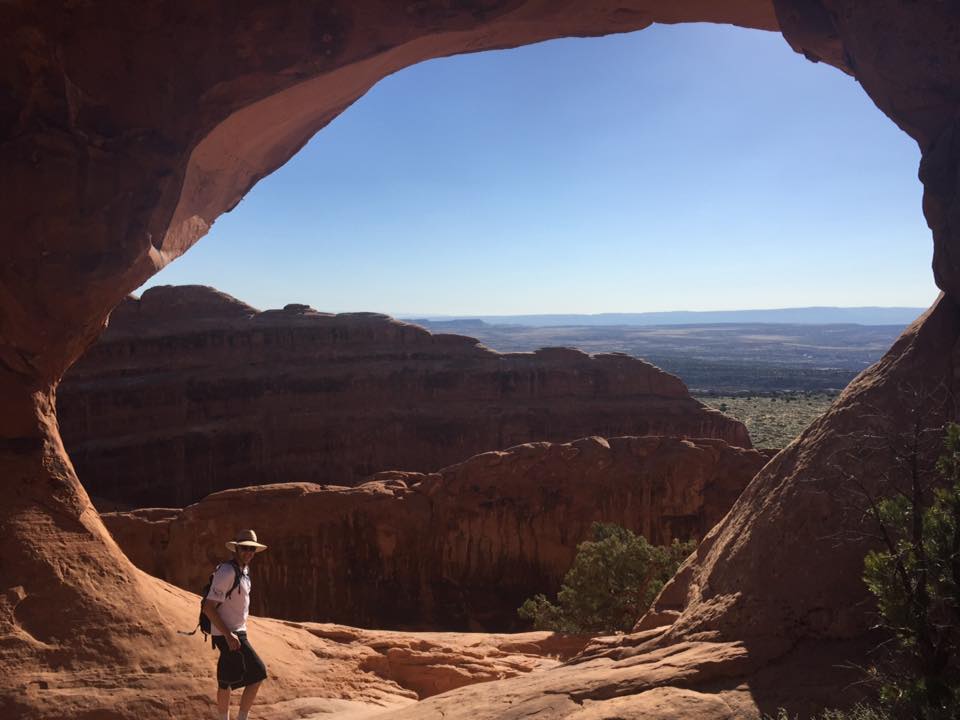
We said goodbye to Bryce Canyon and made the little over 4 hour drive to Arches NP via 70E. Looking at the map below, you could easily add a day or two and explore Capitol Reef NP because it’s not too far out of the way (about 30 miles). Because we only had a week to get back to Chicago, we did not stop here. I have heard so many great things about this park, especially for those who love hiking! It is one of the Mighty 5 Utah parks. If you’d like to explore Capitol Reef, the national park service website has some great information: Capitol Reef. There is also a cute little town within it called Fruita. Check it out if you have the time!
Driving into this park was stunning. Colors of red and orange, towering pinnacles, slabs of slickrock, balanced rocks and arches in the distance, clear skies. I couldn’t wait to explore this park that holds over 2,000 natural stone arches! One of my favorite parts of this park was actually the campground area. Devil’s Garden Campground is the only campground within Arches and is incredibly popular. Booking early is highly recommended to secure a spot, especially in the summer months. You can reserve tent, RV (40 ft and under), and ADA accessible sites at Devil’s Garden Campground.
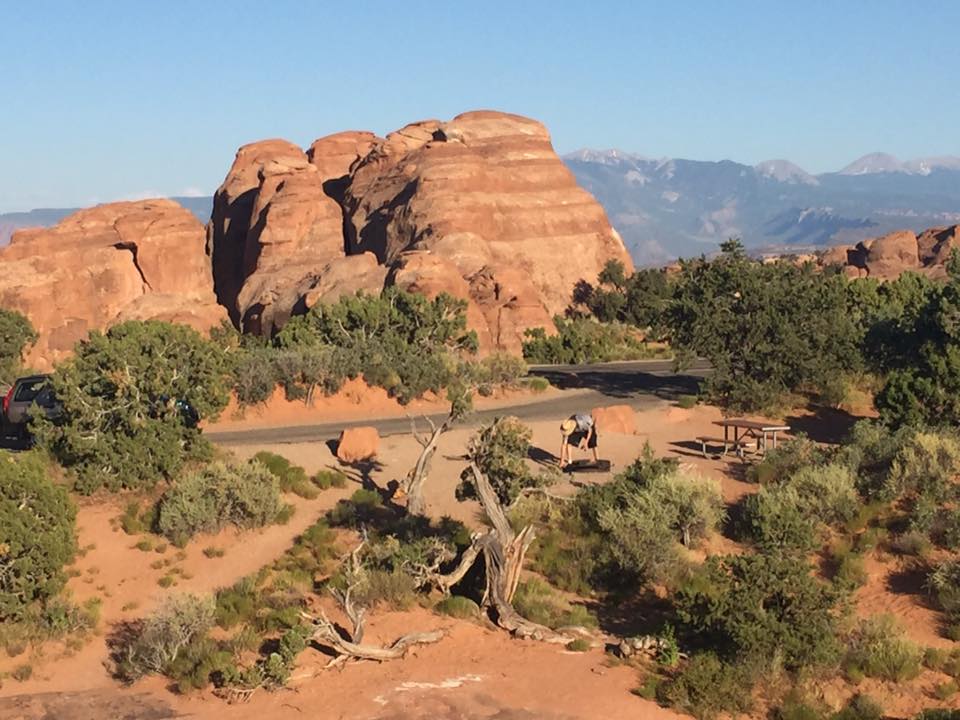
Our view from behind our tent 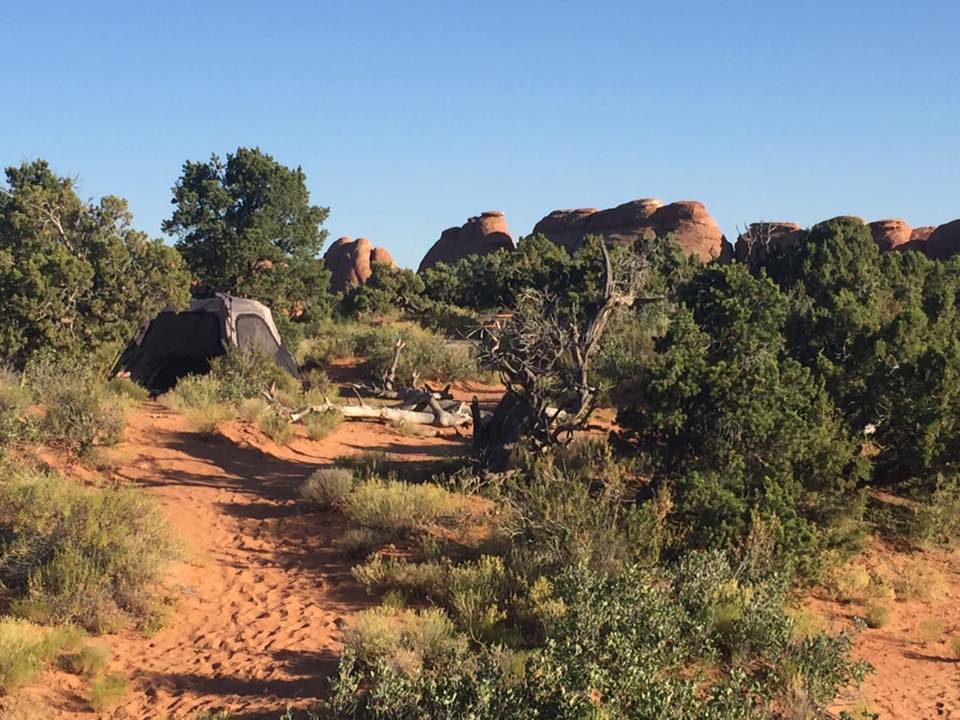
Tent Site

Because we arrived at this park later in the day due to the longer drive, our itinerary will include exploring the trails near our campground on the evening we arrived, and then beginning early the next morning to venture on more hikes before driving to Colorado. In the area of Devil’s Garden where we camped, it turned out to be the premier area for hiking!
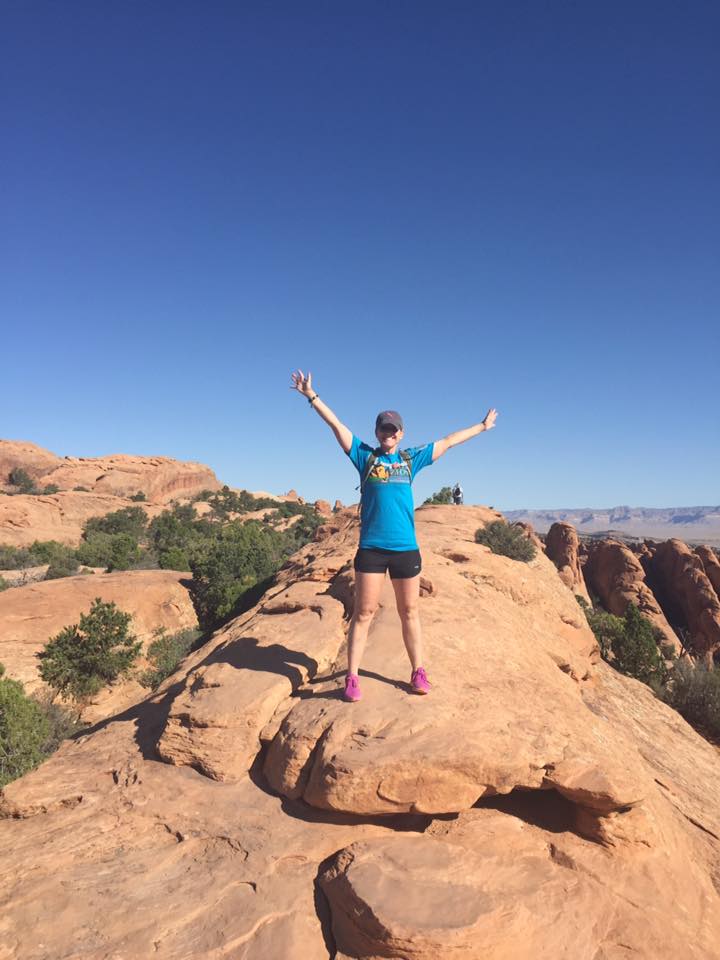
Hiking At Arches National Park
Devil’s Garden Area
Devils Garden is located at the very end of the park road and is 18 miles north of the Arches Visitor Center. Though this seems like a fairly short distance, it will take about 40-45 minutes to get there.
Devil’s Garden Trailhead: The entire trail length is 7.2 miles (the longest trail in the park) and is considered difficult once you pass Landscape Arch.
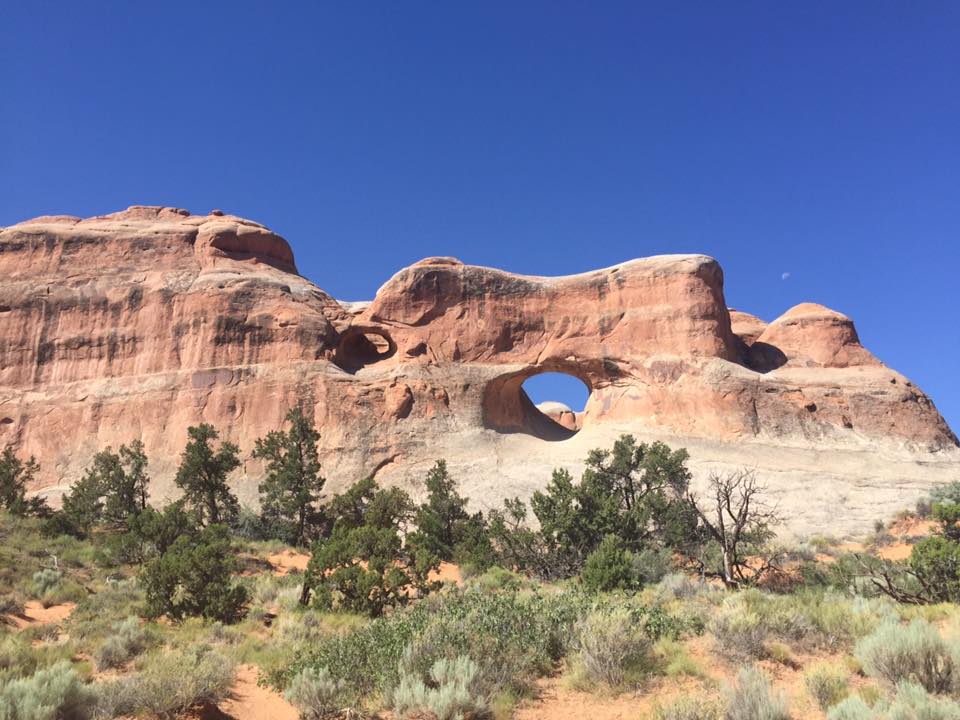
Devil’s Garden Trailhead to Landscape Arch (1.6 miles roundtrip): This arch is along the Devil’s Garden Trail. It is relatively flat with no significant elevation gain. This is the longest arch in North America, with an opening of 306 feet! The picture below just does not capture the magnitude of how big this arch is!

Hiking to Landscape Arch and beyond is just as much fun and breathtaking as actually being there! You can also view Tunnel Arch and Pine Tree Arch along the way to Landscape Arch on your hike.
Tunnel Arch
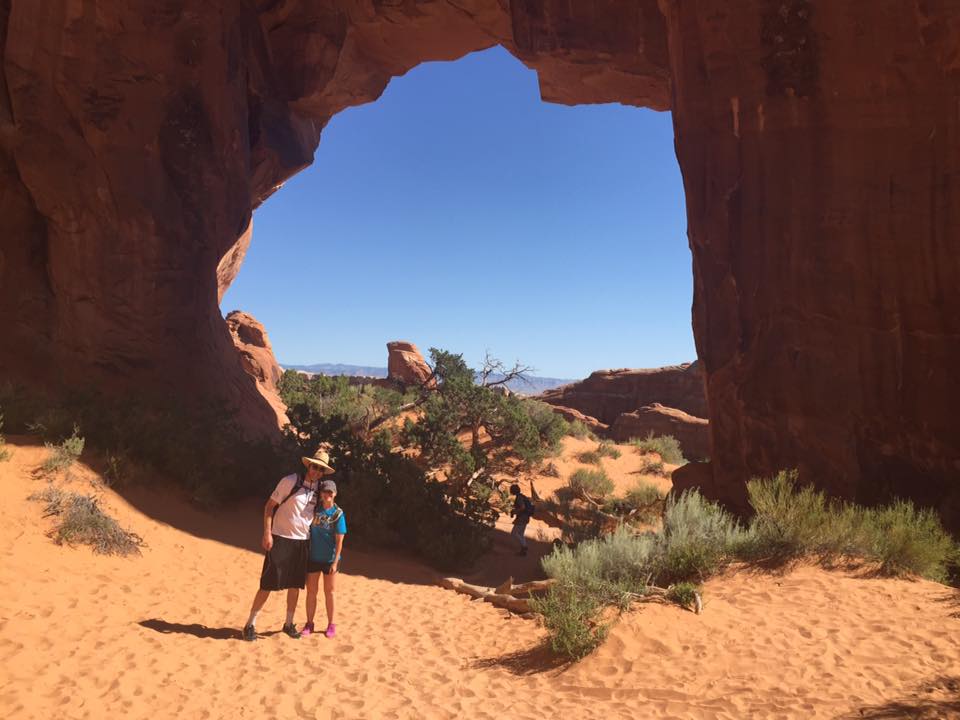
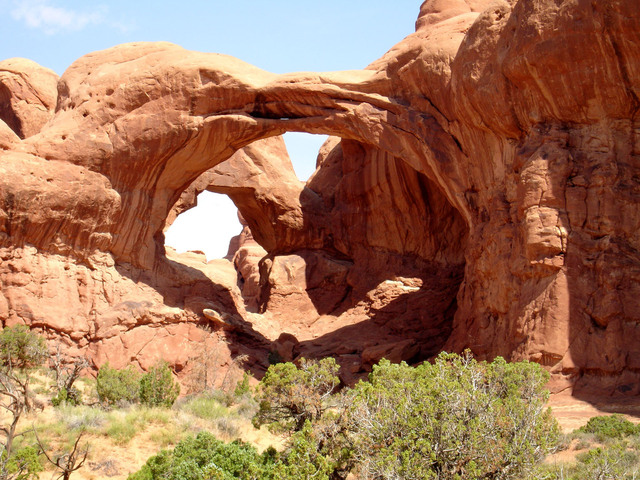
Partition Arch and Navajo Arch: You can venture on past Landscape Arch just a very short distance to Partition Arch and Navajo Arch. Both of these are definitely worth the extra stop. One of our favorite arches was Partition Arch. What a view it was! We stayed here for a while and ate a light lunch we packed and took in the views through the arch.


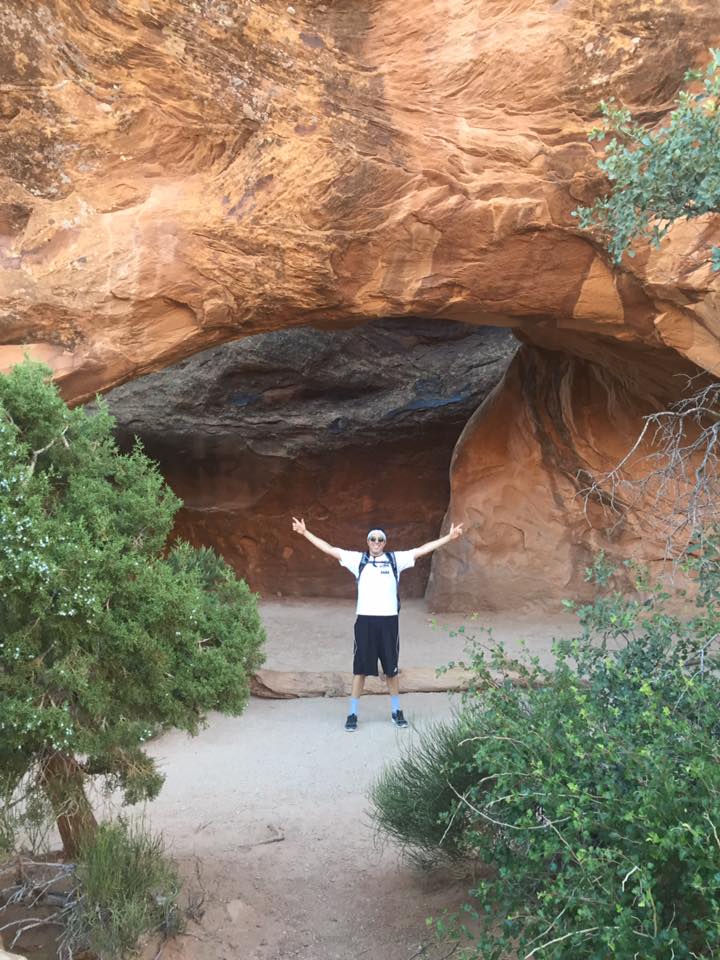
Navajo Arch 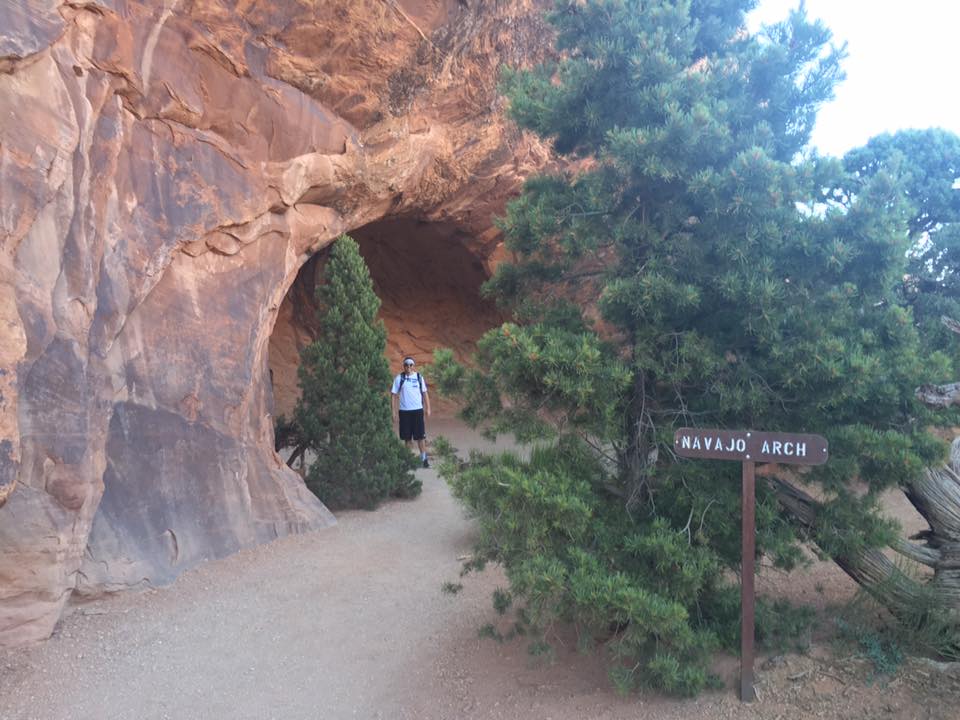
If you are feeling energetic and do not have a fear of heights, Double O Arch is further down the trail past Landscape Arch (4.2 miles out and back), but requires rock scrambling, climbing across slickrock with steep drop offs, and rocky footing.
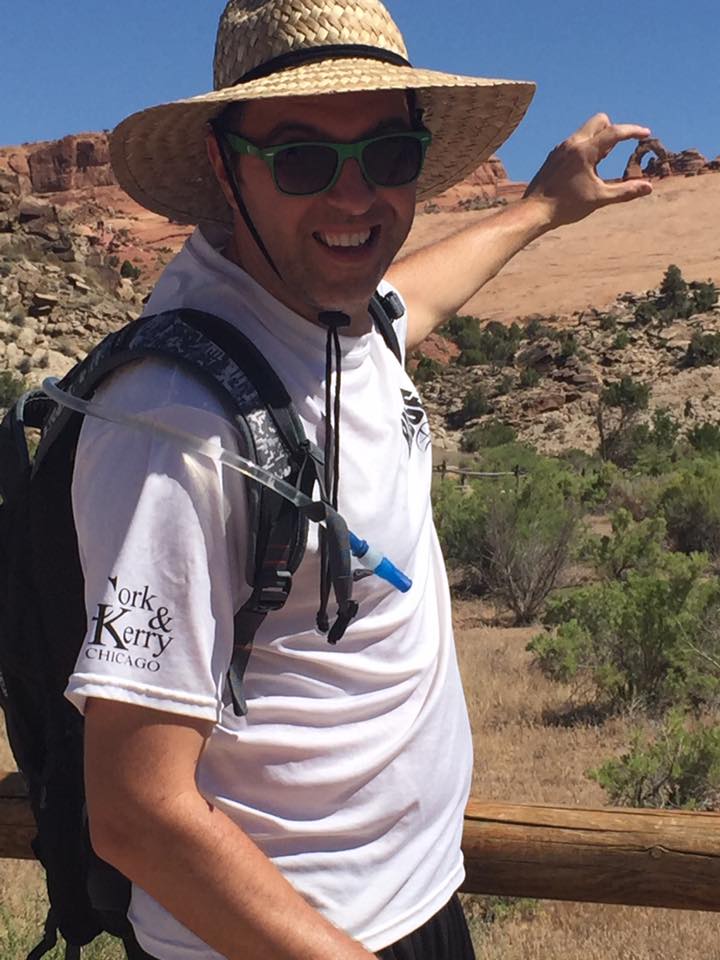
Delicate Arch (3 miles round trip): If you are up for an exciting and challenging hike, you cannot pass up the hike to the iconic Delicate Arch. Chances are, if you’ve been to Utah, you’ve seen this arch! It is the widely recognized symbol of Utah and is displayed on Utah license plates!
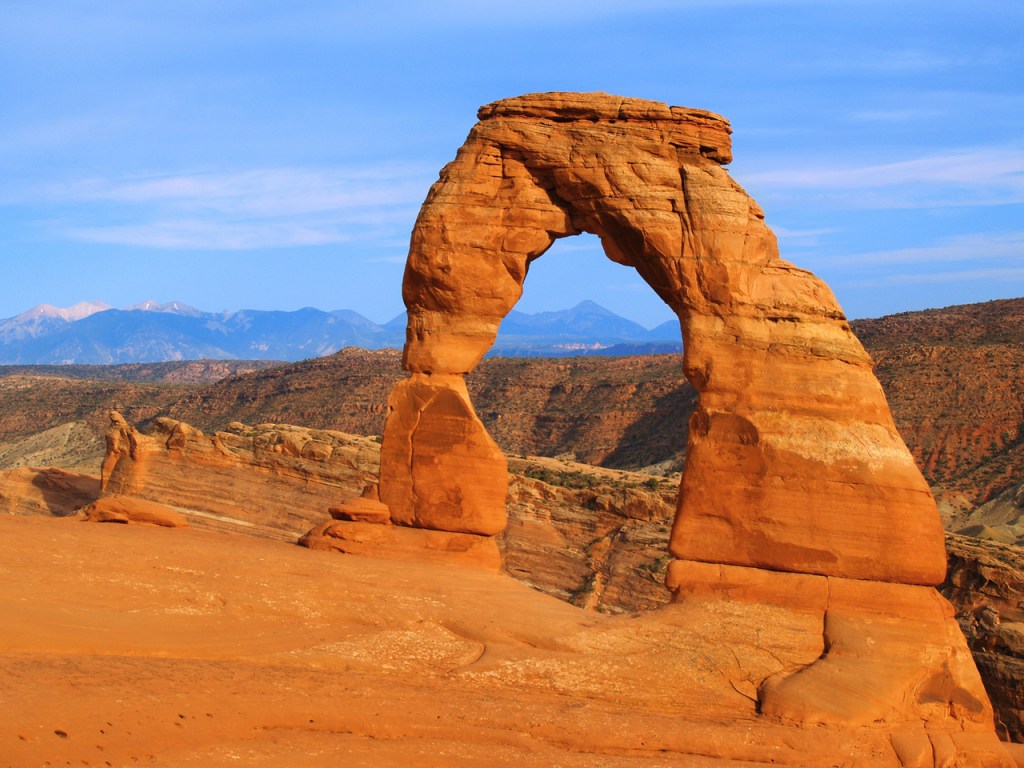
Delicate Arch is 46 feet high and is the largest freestanding arch in the park. Begin this trail at the Wolfe Ranch parking lot. This trail has an elevation gain of 480 feet and has NO SHADE. You MUST bring lots of water for this hike, especially during the summer months when temperatures exceed 100 degrees. Some parts of this trail will have open slickrock with exposure to heights. We did not have time to hike to the arch, but we did view it from afar. If you are not up for this hike, there are two Delicate Arch viewpoints from which you can still enjoy the arch.
*Lower Viewpoint of Delicate Arch (100 yards): Wheelchair accessible. Easy walk. You can view the arch here from a mile away.
*Upper Viewpoint of Delicate Arch (0.5 mile): Moderately difficult; rocky uphill route, but the view is less obstructed than the lower viewpoint.
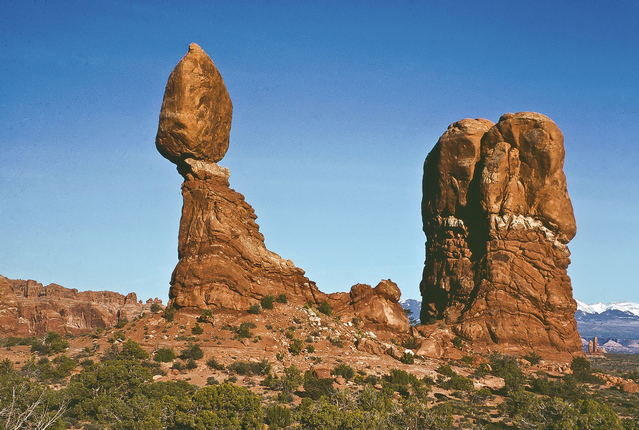
On the way out of the park, we stopped at the visitor center and also enjoyed the views at Balanced Rock. Balanced Rock is one of the most iconic places in the park. How much does that big boulder up there weigh? 3600 tons! Yikes! Eventually, this boulder will fall due to continued erosion, so get out here and visit before it’s too late!
If you’d like to learn about more hikes than I have highlighted, use the national park service for a great resource! Hiking at Arches
Last Stop!
Rocky Mountain National Park, CO
As we made our way further toward Chicago, I knew there was one last stop we HAD to make! Rocky Mountain National Park has always been a dream of mine to experience, and we would be so close as we drove through Colorado! We had to stop! We had one full day to explore this park (and another day of driving the day before), but honestly, you could plan a week long vacation here and within the surrounding area, including Estes Park, a cute mountain town that lies steps outside of the national park entrance.
From Arches, Rocky Mountain is a little over a 6.5 hour drive; 392 miles to Estes East Portal Campground where we tent camped the night we drove in. If I’m being honest, you have to allow yourself far more time than that, between stopping for gas, eating, and possibly pulling over every now and then to take in the views on I70. We didn’t get to the campground until it was late at night. We got a decent night’s rest before getting up early the next day to head to the park. We planned a full day of hiking and enjoying the mountain air. Knowing we only had one day, I picked out the hikes that I wanted to do the most, and trust me, it was hard to decide with 355 miles of hiking trails to choose from! This is a park that should not be visited only once…I knew that we would be back! Again. And again. I LOVE Colorado!
Hiking At Rocky Mountain
This national park service link includes the Full List of Hiking Trails within the park; including the destination, difficulty of the hike, elevation gain, and distance. I will cover the hikes we did around the Bear Lake area, and you won’t want to miss any of them on your trip! Below is a map you can refer back to as you read where we hiked in this area, or use this more detailed map from the park service that includes distances between locations: Bear Lake Summer Trail Guide
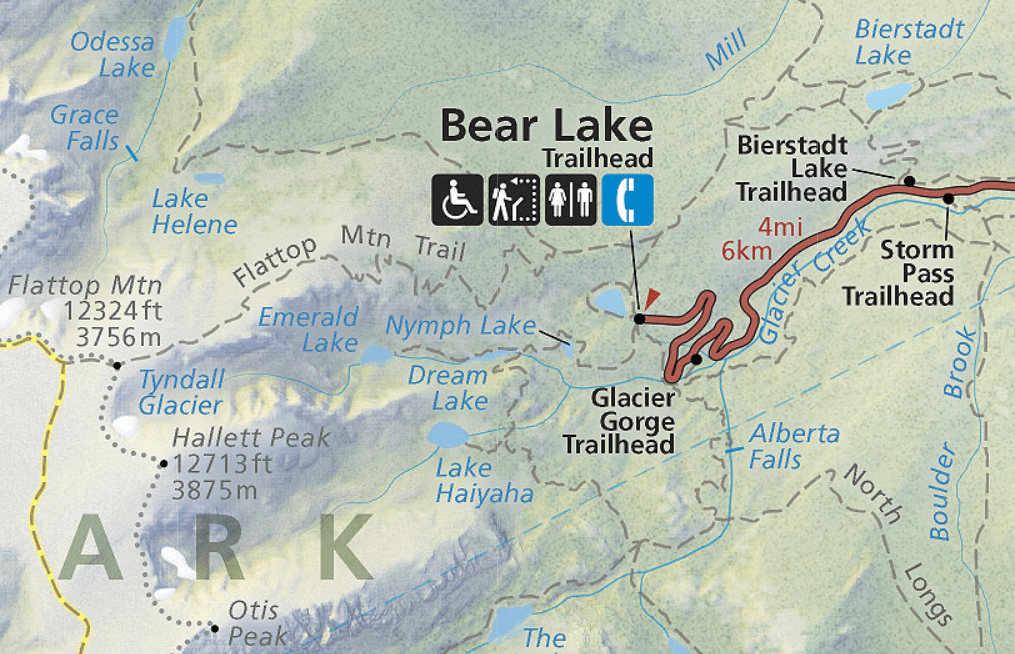
We started EARLY in the morning to get a parking spot at Bear Lake. This is a prime location for multiple hikes. If you don’t begin early, you risk not getting a spot. We found that once people are parked, they aren’t in a quick hurry to leave this area, and for good reason…it’s SO gorgeous. You could spend days hiking in just this area. If you cannot find parking, you will have to utilize the free shuttle service offered to get to Bear Lake. There are numerous shuttle stops within the park that have small parking lots. The visitor center is a shuttle stop location with a larger lot, but it fills quickly. START EARLY! By early, I mean 7 am. The Bear Lake parking lot, for example, often fills by 7:30 am in the summer months. This park sees roughly 4.6 MILLION people annually; with most visitors coming during the summer. I advise that you check out the most current shuttle bus routes and schedule here: RMNP Shuttle Bus Route and Map
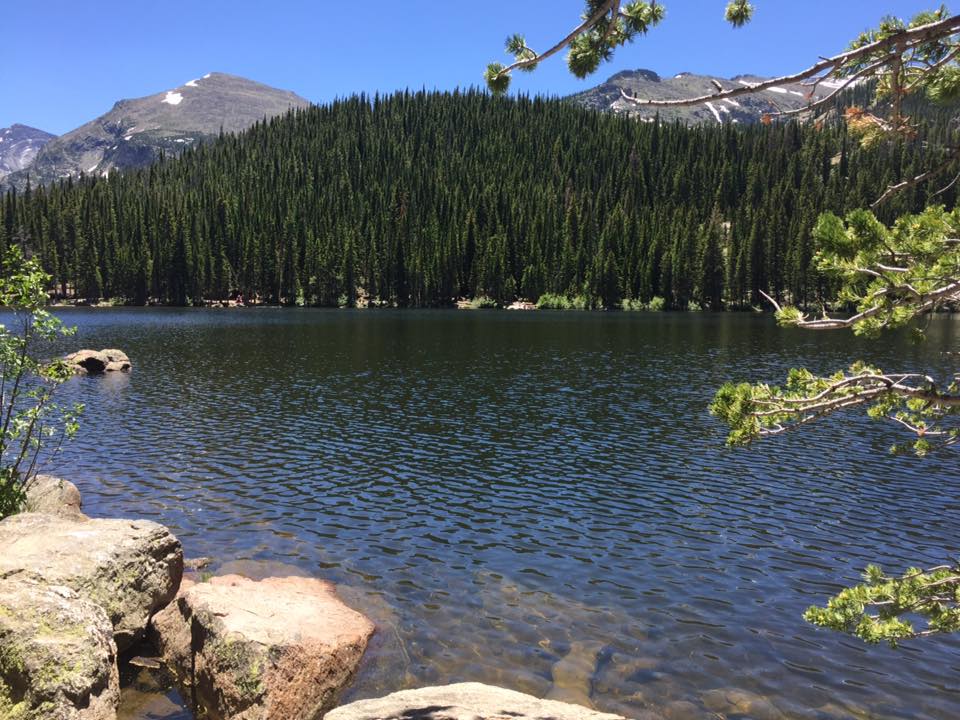
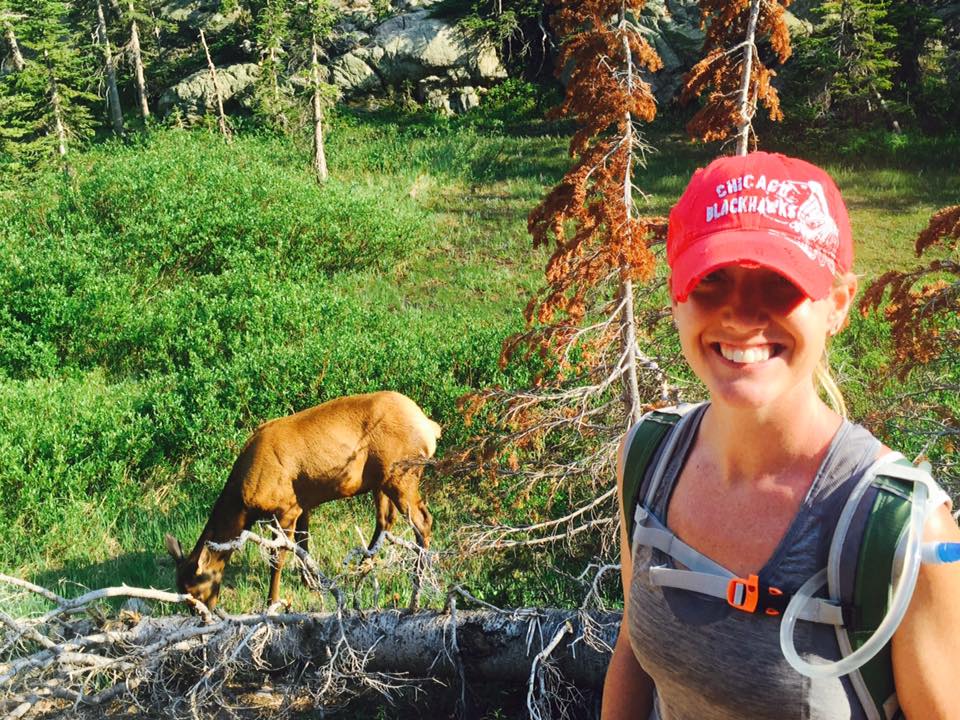
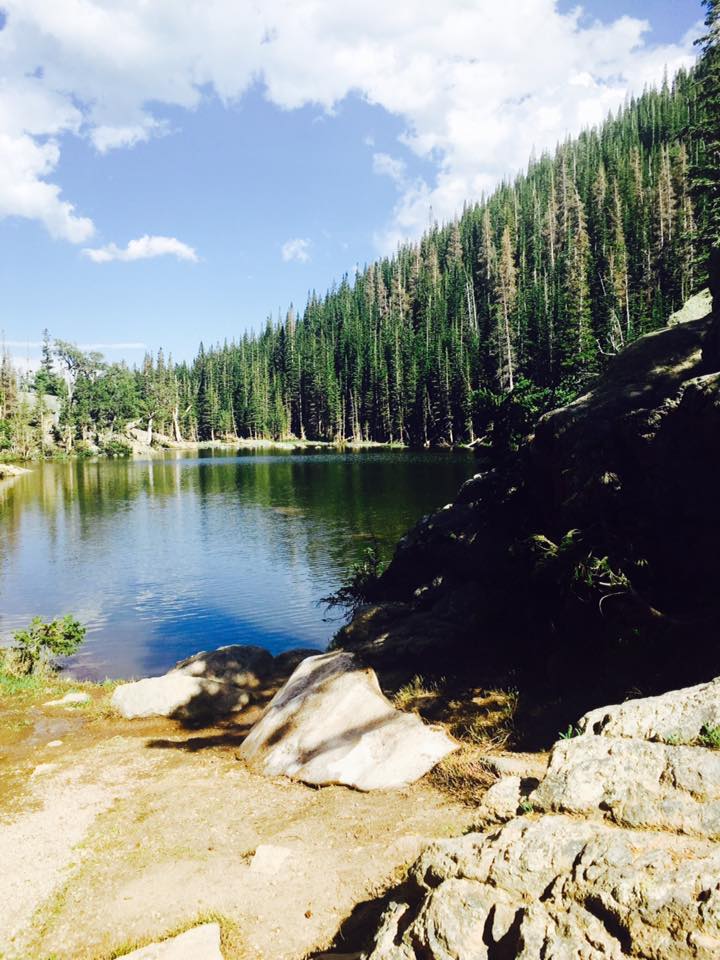
Bear Lake Loop Trail (0.5 mile loop): Bear Lake is absolutely gorgeous! You cannot take one bad picture here! Along this easy, flat trail that follows the outline of the lake, look for elk, moose, squirrels, snakes, and chipmunks. Speaking of chipmunks, they are everywhere! DO NOT feed them! They were a bit of a nuisance when we stopped along the Bear Lake trail for a snack. They will try to climb inside your backpack to grab any food they can get their little paws on!
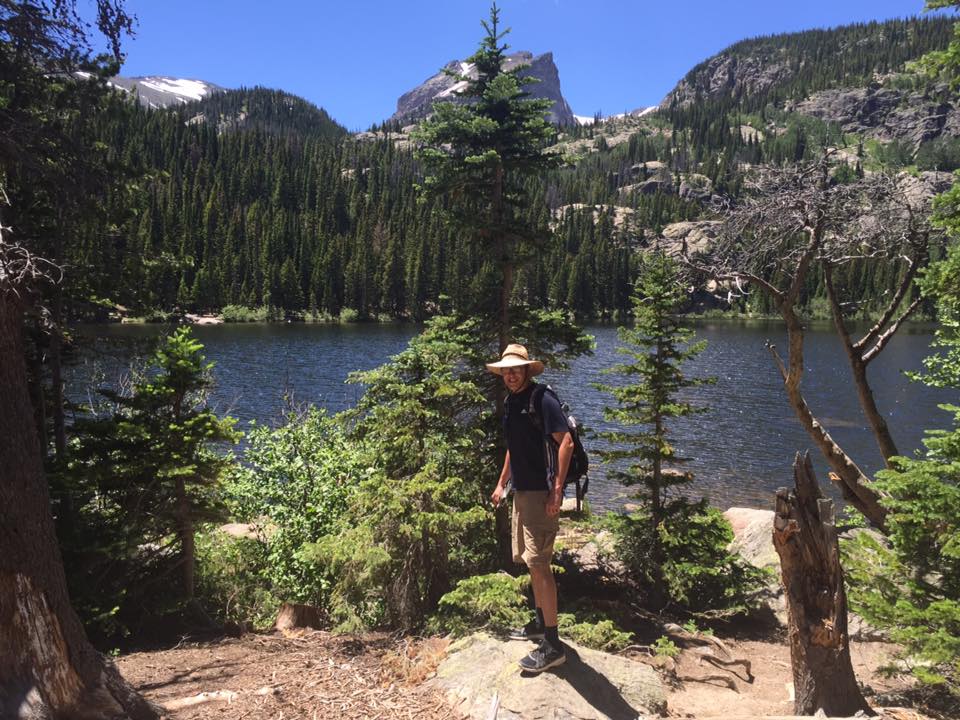

Check out these views at Bear Lake!
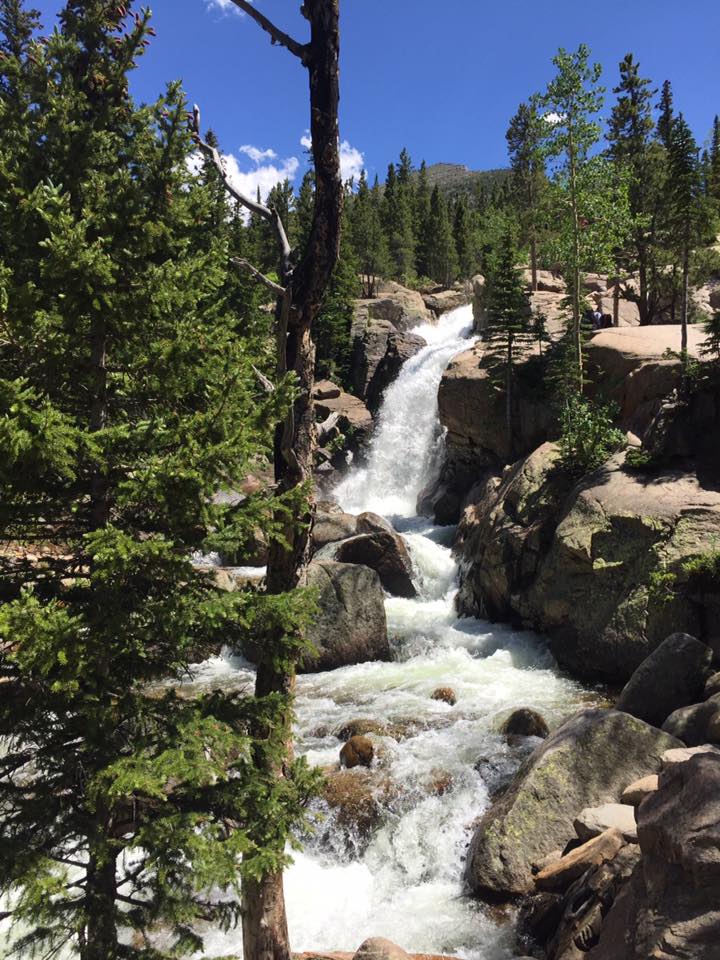
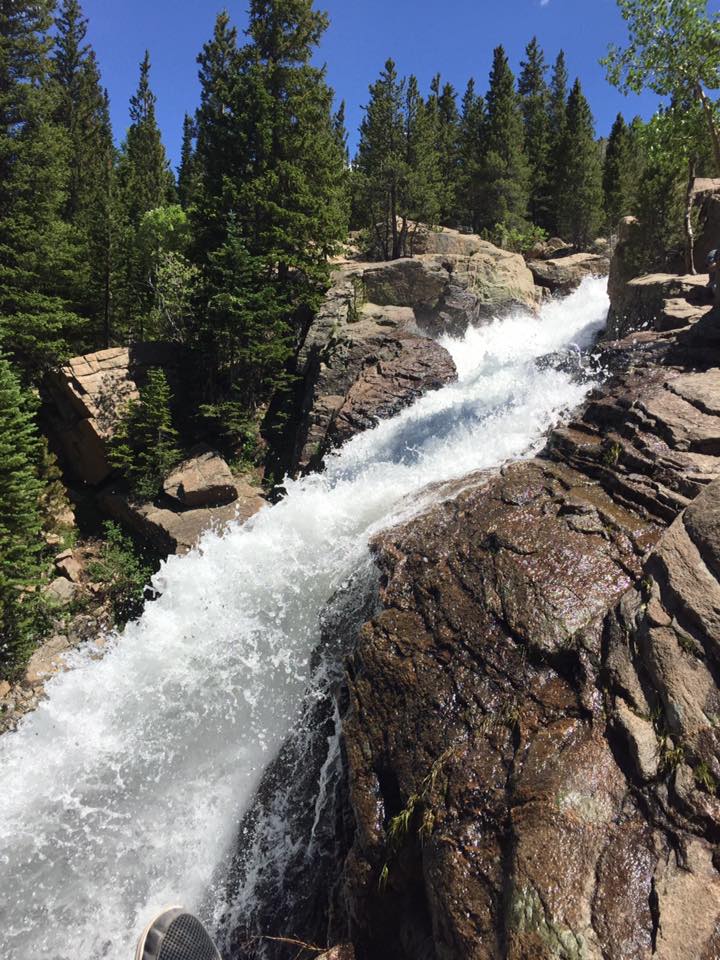
Alberta Falls (1.6 miles out and back): After the short, easy stroll around Bear Lake, we began our next hike to Alberta Falls, which begins at Glacier Gorge Junction trailhead at Bear Lake. This hike is short and easy, and is one of the most popular hikes in the park. Get there early!
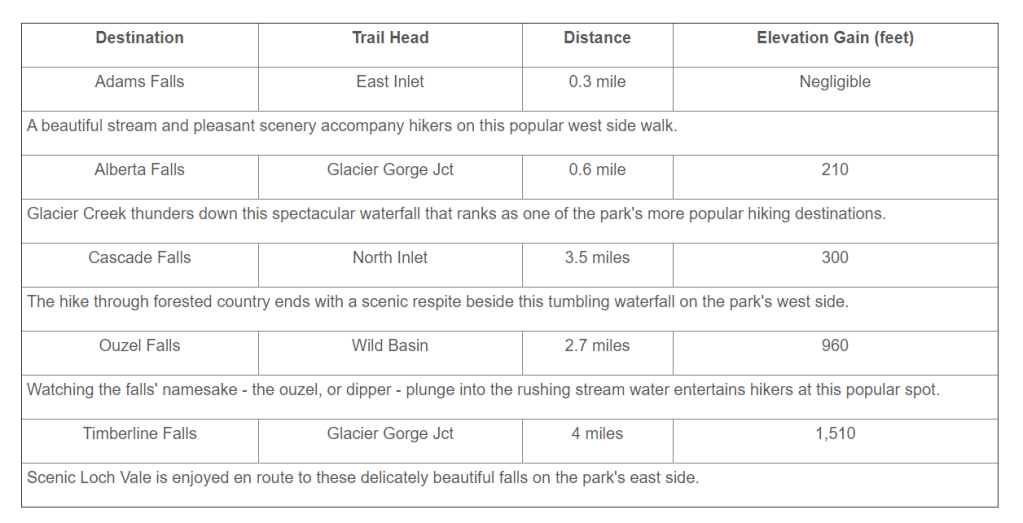
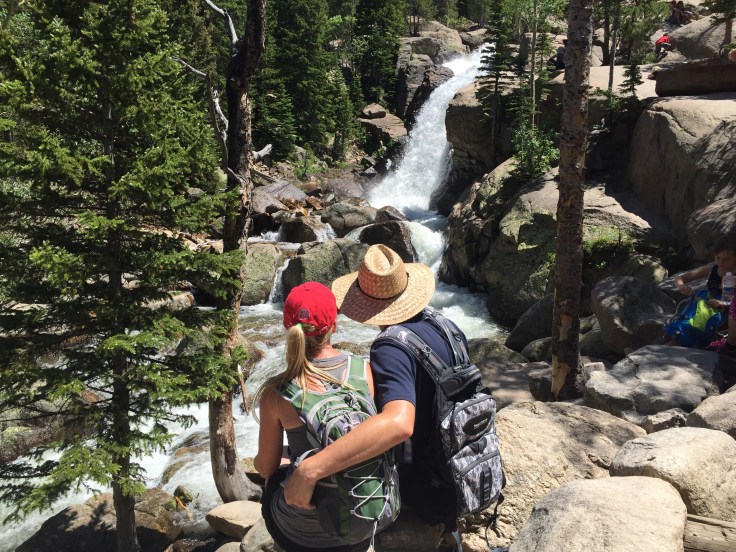
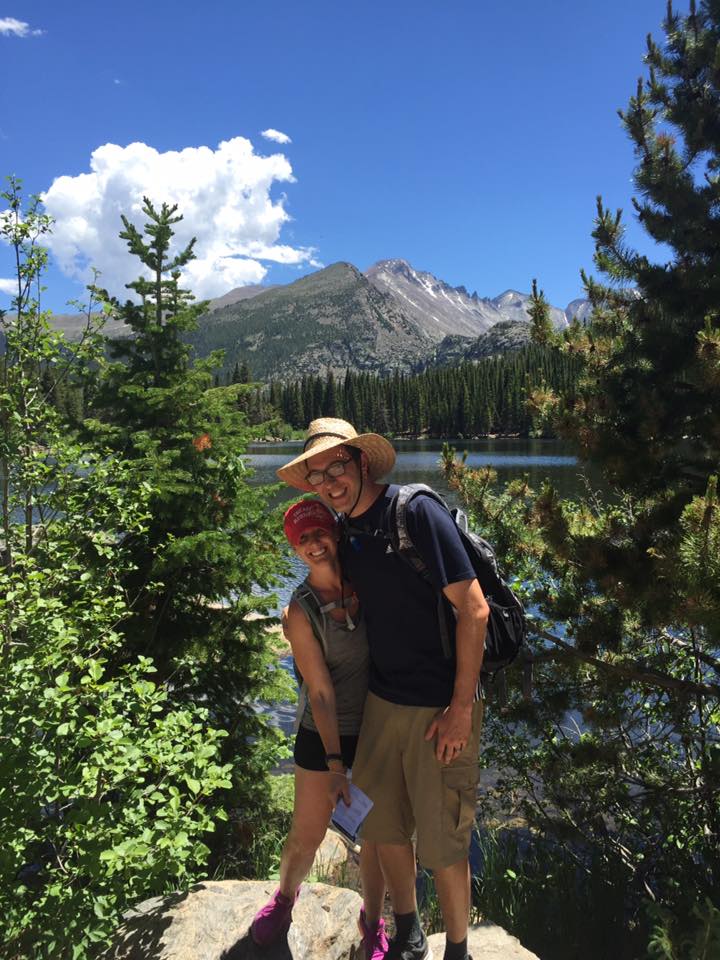
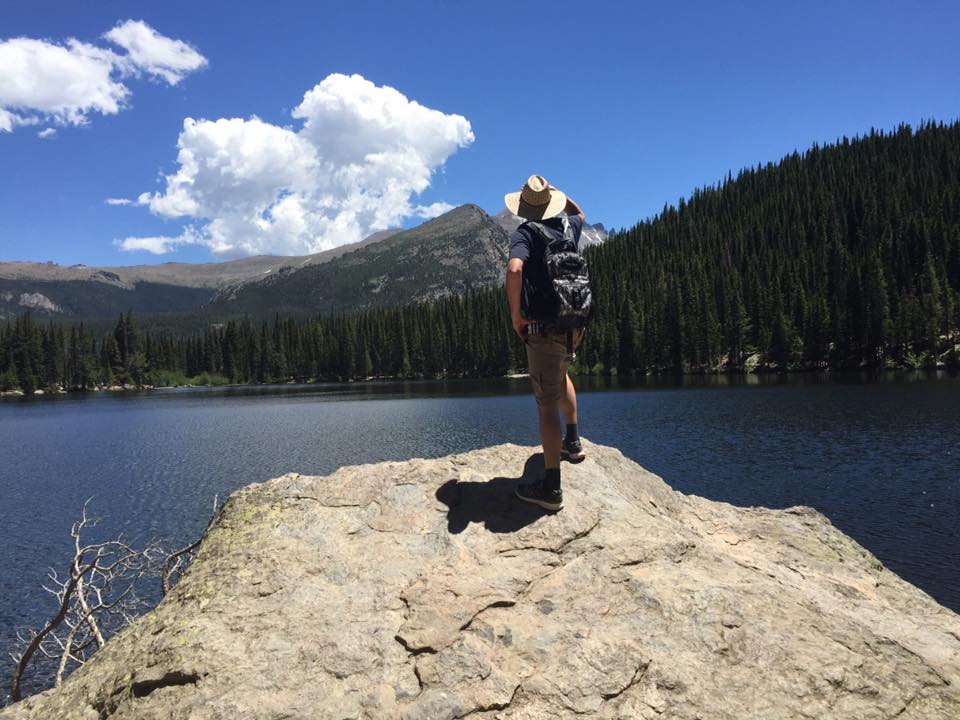
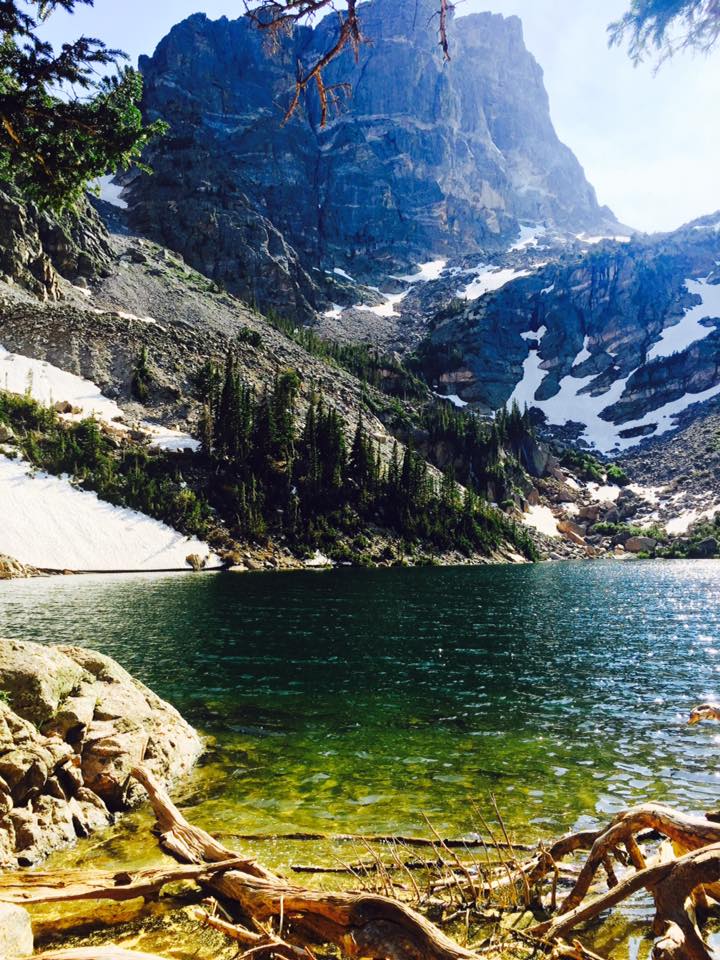
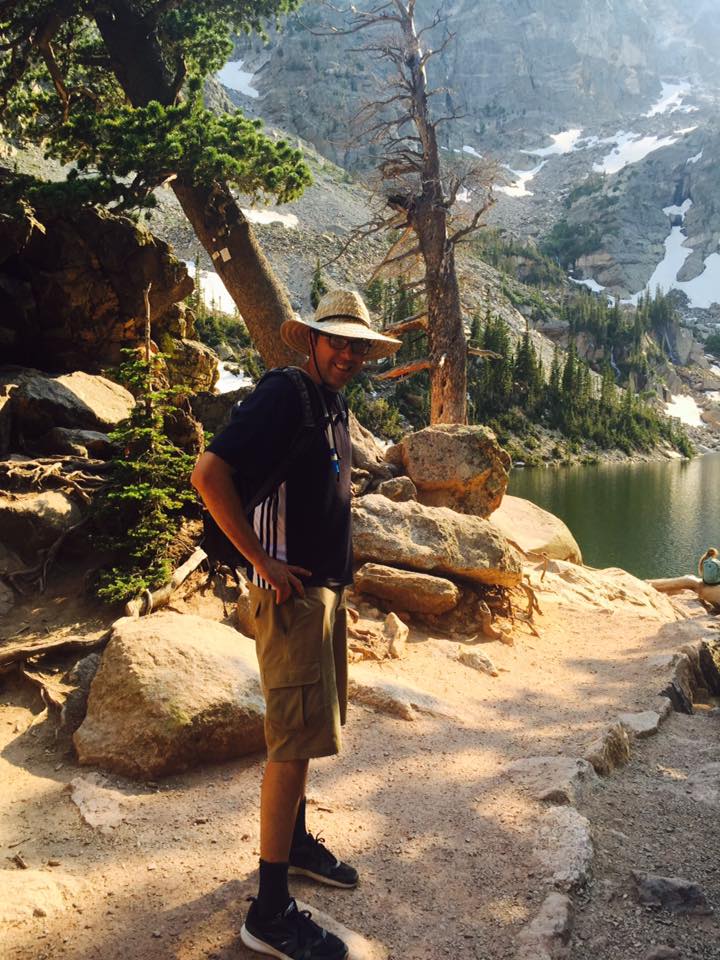
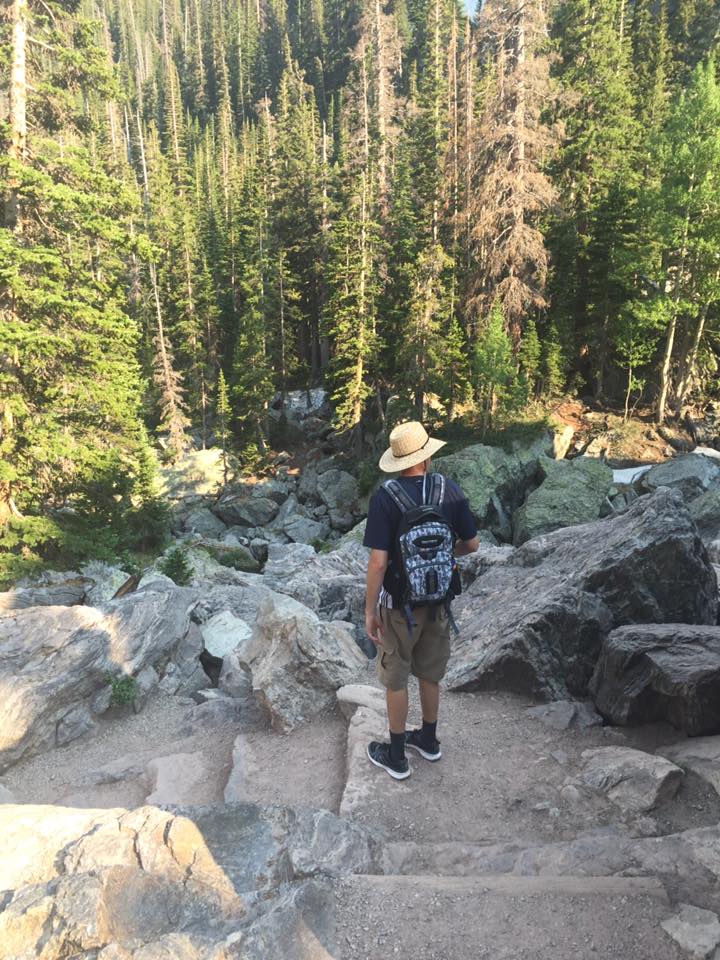
Emerald Lake (3.5 miles out and back, about 700 feet elevation gain): After returning from Alberta Falls, we took our next adventure to Emerald Lake. This trail begins from the Bear Lake Trailhead and is a very popular hike. Along this trail, you will pass 2 alpine lakes: Nymph Lake (at 1.2 miles roundtrip) and Dream Lake (at 2 miles roundtrip). At the end of the trail, you will approach the absolutely beautiful Emerald Lake (at 3.5 miles roundtrip). In the distance, you can see the rocky peaks of Flattop Mountain at 12,324 feet and Hallett Peak at 12,713 feet. Once we arrived here, we had lunch on the rock ledges and enjoyed the view. Although there were many people here, it was still so quiet and peaceful.

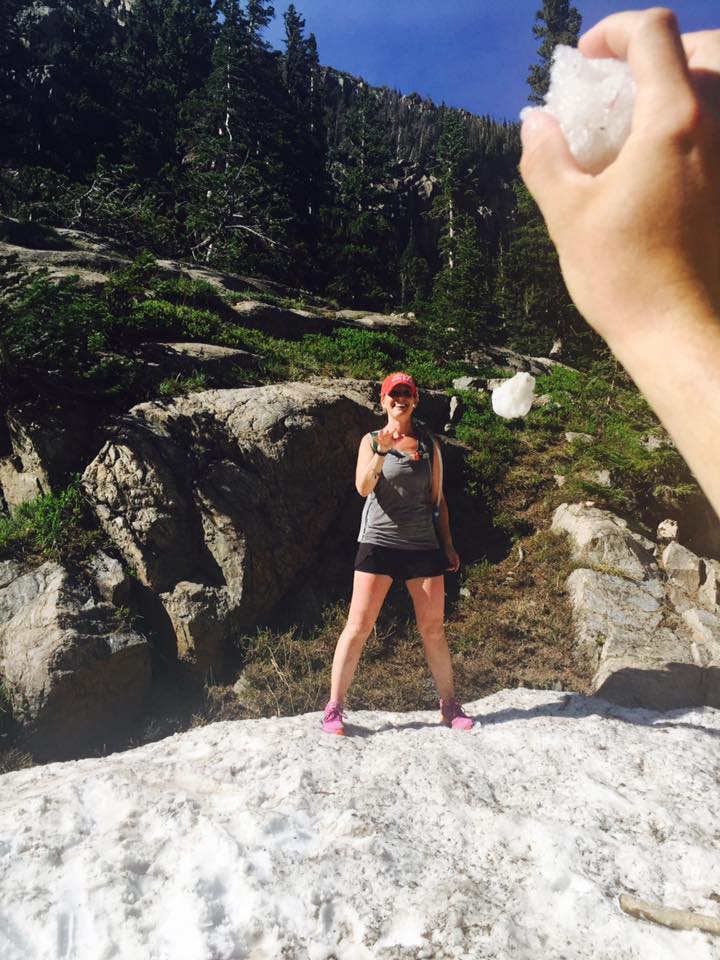
A snowball fight in June! 
A Note About ALTITUDE
This statement comes directly from the Rocky Mountain National Park Service, and I would read every bit of it! Twice. “As you plan your hike, keep in mind that park elevations range from 7,500 to over 12,000 feet. Even very fit individuals coming from lower elevations may experience altitude problems. Symptoms include headaches, shortness of breath, insomnia and rapid heartbeat. After a few days your body will have made some physiological adjustments to higher elevations, but full acclimation may take weeks. To minimize symptoms drink plenty of fluids, avoid alcohol, don’t skip meals and get plenty of rest. Although you may not feel thirsty, the “thinner” air at high elevations actually results in increased water evaporation from your lungs. Again, drinking extra water may prevent a bad headache or other altitude symptoms. Ultraviolet light is stronger in the mountains because there is less atmosphere for the sunlight to pass through. Wear sunscreen, a hat, sun glasses and consider wearing a long sleeved shirt if you are out in the sun for an extended period. If you have never hiked before or are traveling with children, check out the recommended accessible trails. Ranger-led walks are free and can increase your confidence while you learn more about the park. Rocky Mountain National Park is a great place to discover how traveling by foot brings you closer to nature.”
All Good Things Must Come To An End…Or Do They?
When we arrived back at home, I was definitely drinking the national park juice, if you know what I mean. I was so high on all the things we had experienced in that week, and I couldn’t come down from how mind-clearing and freeing it felt to get out and explore our beautiful country and take in the fresh air. I regretted that I had known so little about our national park system for so many years prior to this trip. Months later, I found myself still in awe, looking at pictures, telling stories of the trip to our kids, and dreaming if we’d ever do it again. I mean, we had very young kids. In the past, I had come up with many excuses on why traveling with young kids was cumbersome. We had taken short trips here and there, but nothing like what Marc and I had done. And as I flipped through the last page of our road trip memory book, I decided…I wanted my kids to experience THIS.
I wanted so much for them to experience what we had. I wanted them to appreciate our country and the freedom to explore what so many take for granted. I wanted them to know there was so much more out there than the suburban city they live in outside of Chicago. So much to experience and learn. Some of the best learning comes from DOING. I wanted them to visit our national parks and learn about the history and culture there, the landscape, and the people who lived there before us. I wanted them to take hikes and be in complete awe at the scenery surrounding them. Most of all, I wanted them to appreciate the beauty of nature.
After our trip in 2016, we would continue to explore our national park system in a whole new way…with our kids in tow on ALL of our road tripping experiences. Since 2016, we’ve taken our kids on 3 summer road trips of varying distances…4 weeks in 2017, 5 weeks in 2018, and 2 weeks in 2019 with our girls and our newest addition, who was only 5 months old at the time of our trip. This coming summer in 2020, we are excited to take a month long trip out west with our family of 5, and I cannot wait to share it all with you!
And so began my motto…all good things DON’T have to come to an end. Not really anyway. Good things can keep going as you anticipate with excitement the next great experience; whether that be exploring someplace new or creating a special memory with your family at home. It really doesn’t matter how young or old you are…there is a mountain, a coast, a spot under a tree, or a patch of sand…that’s waiting for you, no matter how long it might take you. You will find as you begin your adventure with us and then create your own, whether it be at home or on the road, that all good things are created with a little love…and dirt! 🙂
Much Love and Adventure is Waiting For You! -Shelley

Note: This page may contain affiliate links in which we receive a small commission if you decide to make a purchase through clicking on the links. This is at no extra cost to you. 🙂

Leave a comment