Have you been wondering how to put to good use a wall in your child’s…or even your own room? Why not create a Wall of Memories? This idea initially came to me after going through a few memory books with my kids…road trips we had been on and photo albums highlighting special moments in their lives. Creating this look was super easy!
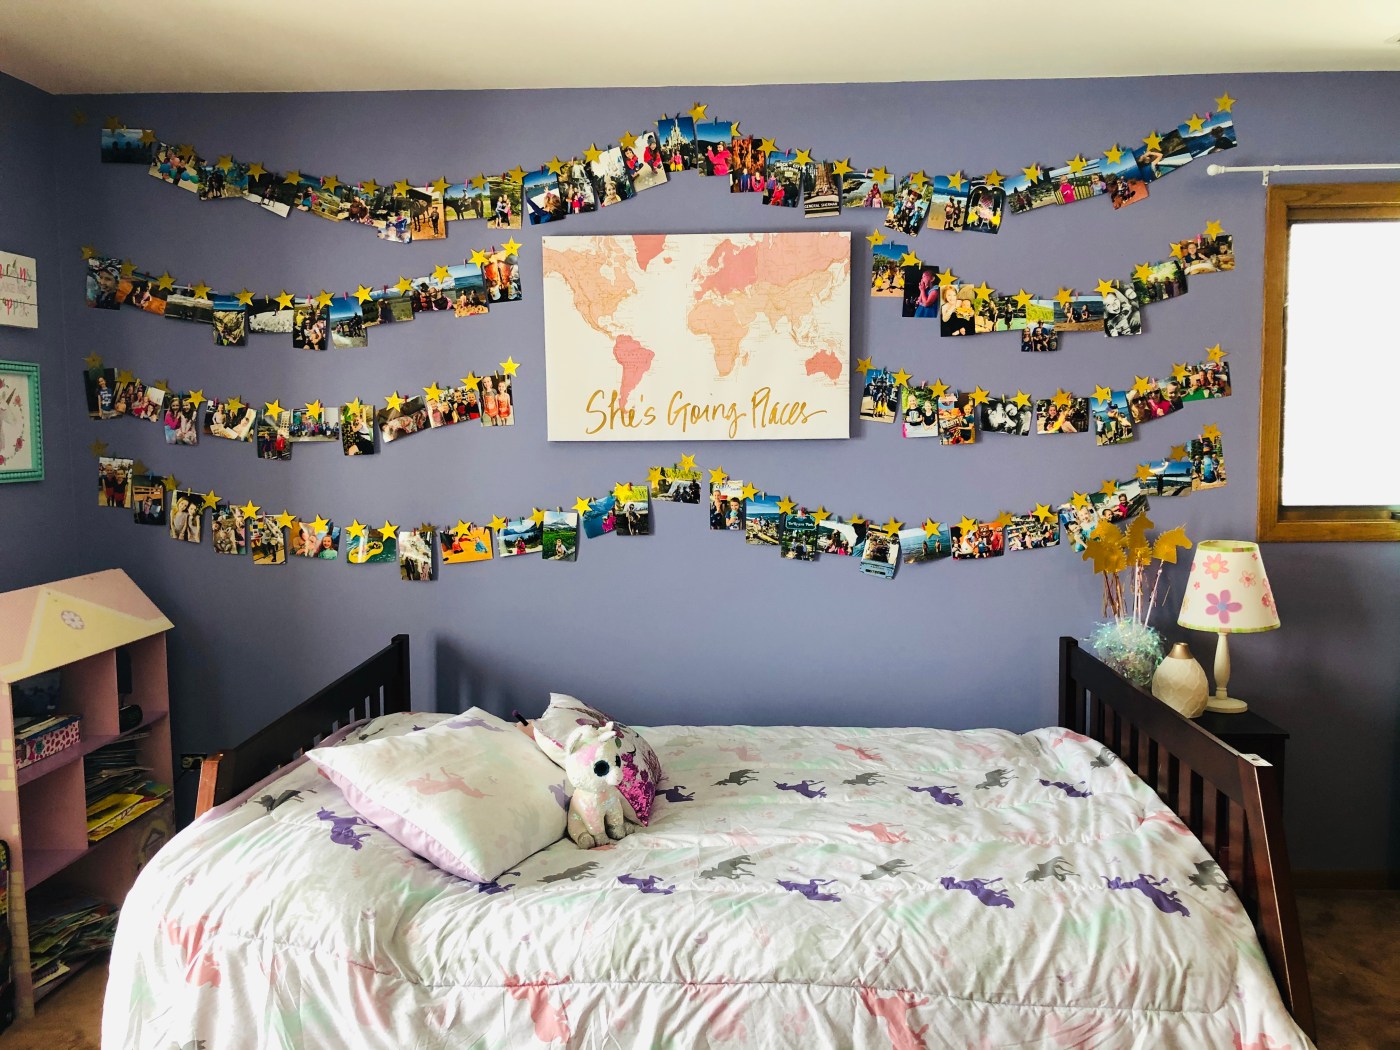
Step 1: Get a large canvas or frame that you love for the center. I chose this one from Hobby Lobby because it fit perfectly with the theme I was going for.
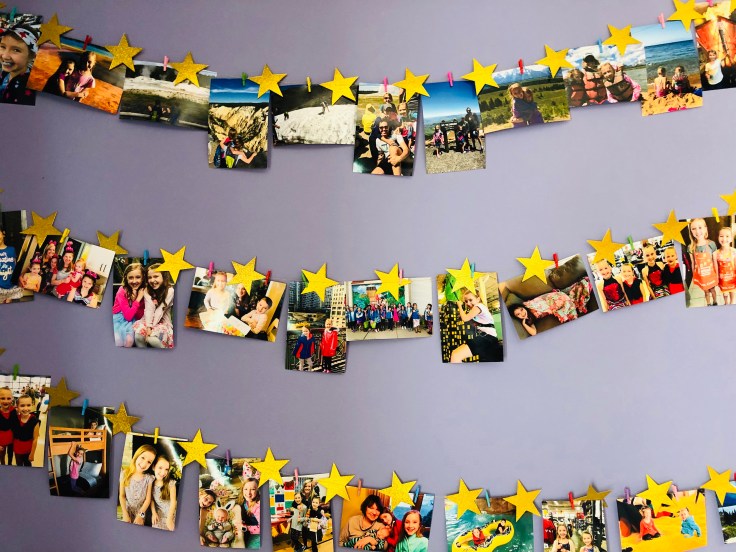
Step 2: Get the photos. The pictures I hung were of special moments in my second grader’s life…losing her tooth at the fireworks show in Disney, a hike up a mountain that she was proud of, her first horseback ride, the first time she saw the ocean, trips to the park, dance recitals, running races, sleepovers with friends; things like that. Choose photos that highlight special memories you’ve had over the years! If you are doing this for your child’s room, do it together! Let him/her choose photos, too!
Step 3: Get the garland and mini clips. You don’t have to use star garland; any garland that you love or that matches your center frame will be perfect. I chose gold stars because it reminded me of the positive phrase, “reach for the stars,” and the lettering in the canvas was sparkly gold, as is many other decorations in her room. The gold stars were double-sided, so when hanging the pictures, it didn’t matter if the stars flipped over; much easier than trying to keep them on one side. There were many other colors to choose from as well, and they came in long strips that totaled 130 feet…plenty to cover your wall: Gold Stars.
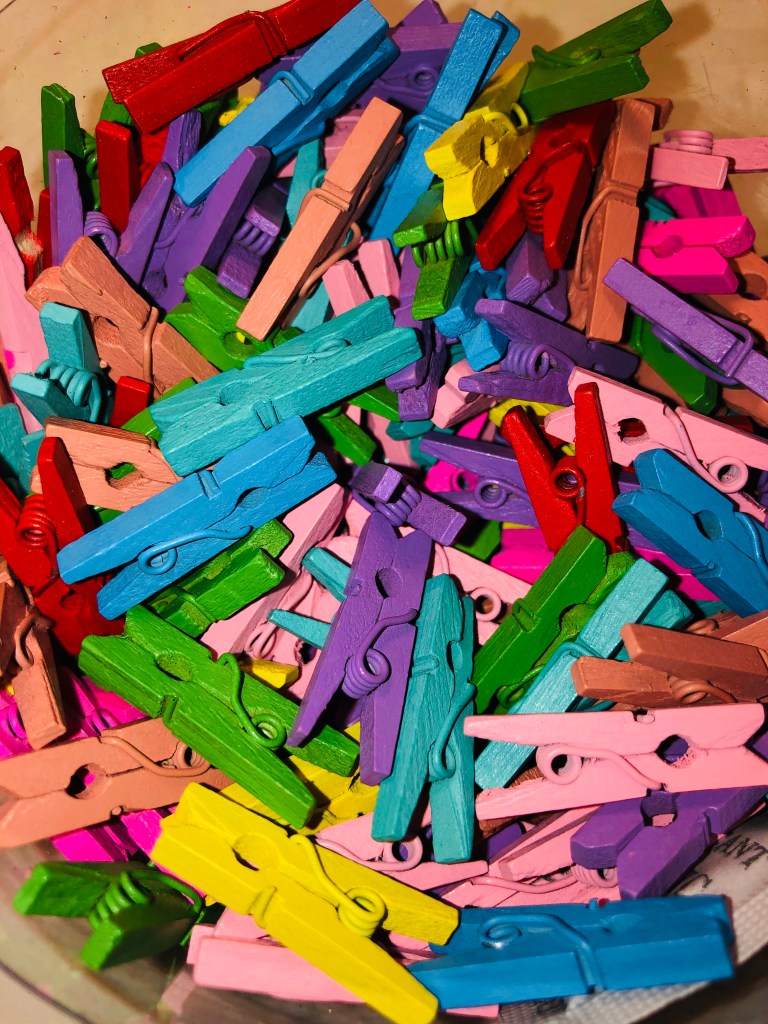
The mini clips I chose were the perfect combination of colors for her room, but you can choose any colors you like to match. The clips were multi-colored and came in a pack of 300: Mini Wooden Clips.
Step #4: Hang the canvas first. Measure and make sure you are hanging the canvas in the middle of the wall. Leave enough space at the top to add garland.
Step #5: Hang the garland: I hung the garland in a scoop from the bottom first and worked my way up on the left side, and then the right. Allow a little slack (make it droop) when nailing it in place. I nailed both sides of the garland in place, and then cut off the excess.
Step #6: Hang the pictures. This was the fun part! I loved revisiting all the places we had gone and the special moments in my daughter’s life as I hung them. It was such a relaxing project!
BONUS! At the time, I didn’t realize that I was also creating conversation starters between my daughter and I when I put her to bed. We pick a photo before we turn out the lights, and then talk about it. She would tell me what she remembered of the moment and why she thought it was special. This project is so much more than just a decoration to take up a wall. It became a Wall of Memories…our memories that we can reminisce about together each night. When life sometimes brings unwanted stresses and burdens, our Wall of Memories will always be there to remind us that we truly have a blessed life!


Note: This page contains an affiliate link in which we receive a small commission if you decide to make a purchase through clicking on the links. This is at no extra cost to you. We only share products we believe would be helpful to you, and each purchase helps toward the cost of running our website. 🙂

Leave a comment